Overview
This guide will show you how to Import SolusVM VMs into Virtualizor.
Your SolusVM control panel will continue to work during and after the import.
After importing when you are satisfied, you can choose to disable SolusVM.
The importer is very efficient and the Enduser(s) SolusVM passwords will also continue to work with the username set as their email address in Virtualizor.
Its also possible to convert all your WHMCS SolusVM orders into Virtualizor orders so that all clients can continue to use the VMs without any issue.
The Process
The process to convert is as follows :
- Install Virtualizor on the SolusVM Master.
- Install Virtualizor OpenVZ / Xen / KVM on the SolusVM Slaves as per the virtualization on the SolusVM Slaves (reboot not required after installation).
- Add the storage on each server. Virtualizor Admin Panel -> Storages -> Add storage.
- Add all the newly installed Virtualizor Slaves to the newly installed Virtualizor Master.
- In the newly installed Virtualizor Admin Panel -> Import SolusVM wizard see the Nodes are showing properly.
- Then Import Node Groups, Plans, Users, IP Pools, OS Templates.
- After this, the VMs will be imported on a per Node basis by changing the Active Server in the top bar.
- (Optional) Use the WHMCS converter and convert all SolusVM orders into Virtualizor orders.
- Now verify everything and proceed to disable / remove SolusVM.
Install Virtualizor on Master
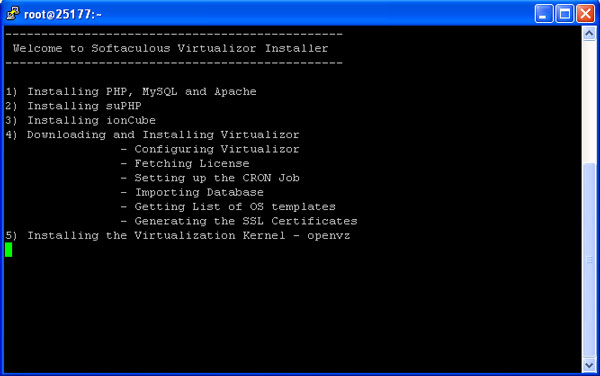
You will need to install Virtualizor on the SolusVM Master.
This will not disturb SolusVM as Virtualizor uses the EMPS Stack maintained by Virtualizor team which is independent of SolusVM.
You will need to install Virtualizor OpenVZ or Master only as per the SolusVM master you have.
Install Virtualizor on Slaves
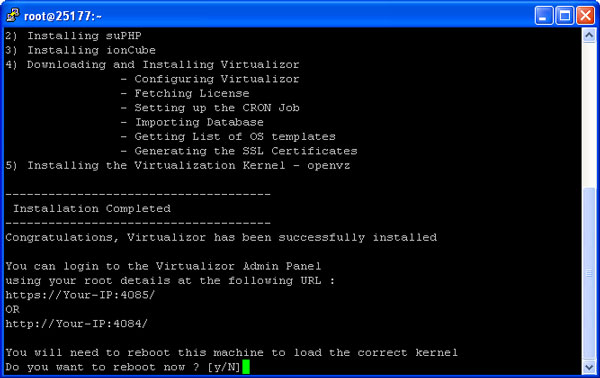
You will need to install Virtualizor on the SolusVM Slaves as well.
This will not disturb SolusVM as Virtualizor uses the EMPS Stack
maintained by Virtualizor team which is independent of SolusVM.
You will need to install Virtualizor OpenVZ, Virtualizor Xen OR Virtualizor KVM as per the SolusVM slave you have.
Add Storage
After installing Virtualizor on SolusVM Master and SolusVM Slave, you
will need to add the storage.
Go to Virtualizor Admin Panel ->
Storages -> Add Storage.
Add Slaves
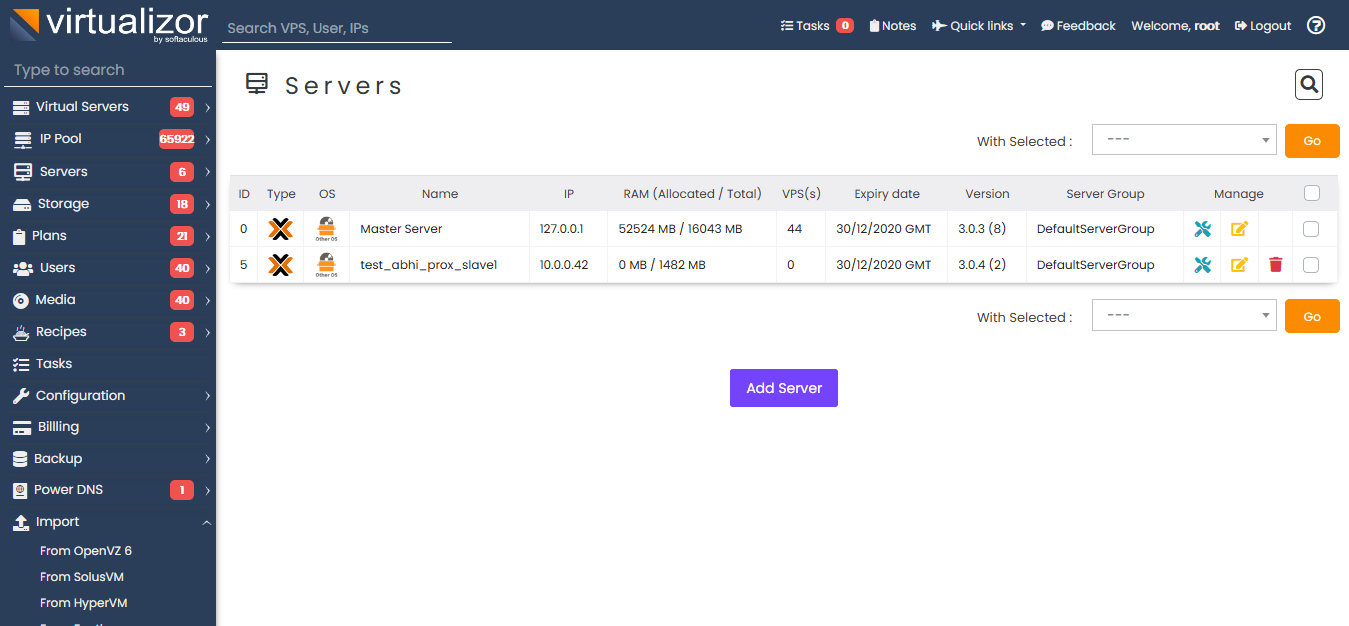
Now you will need to add the Virtualizor Slave Servers installed on top of SolusVM Slaves.
The process to add a Slave server is the same as adding any Virtualizor Slave.
View Nodes
Proceed to see all the slaves have been added properly.
In the newly installed Virtualizor Admin Panel go to Import -> Import SolusVM wizard and click on the View Nodes utility.
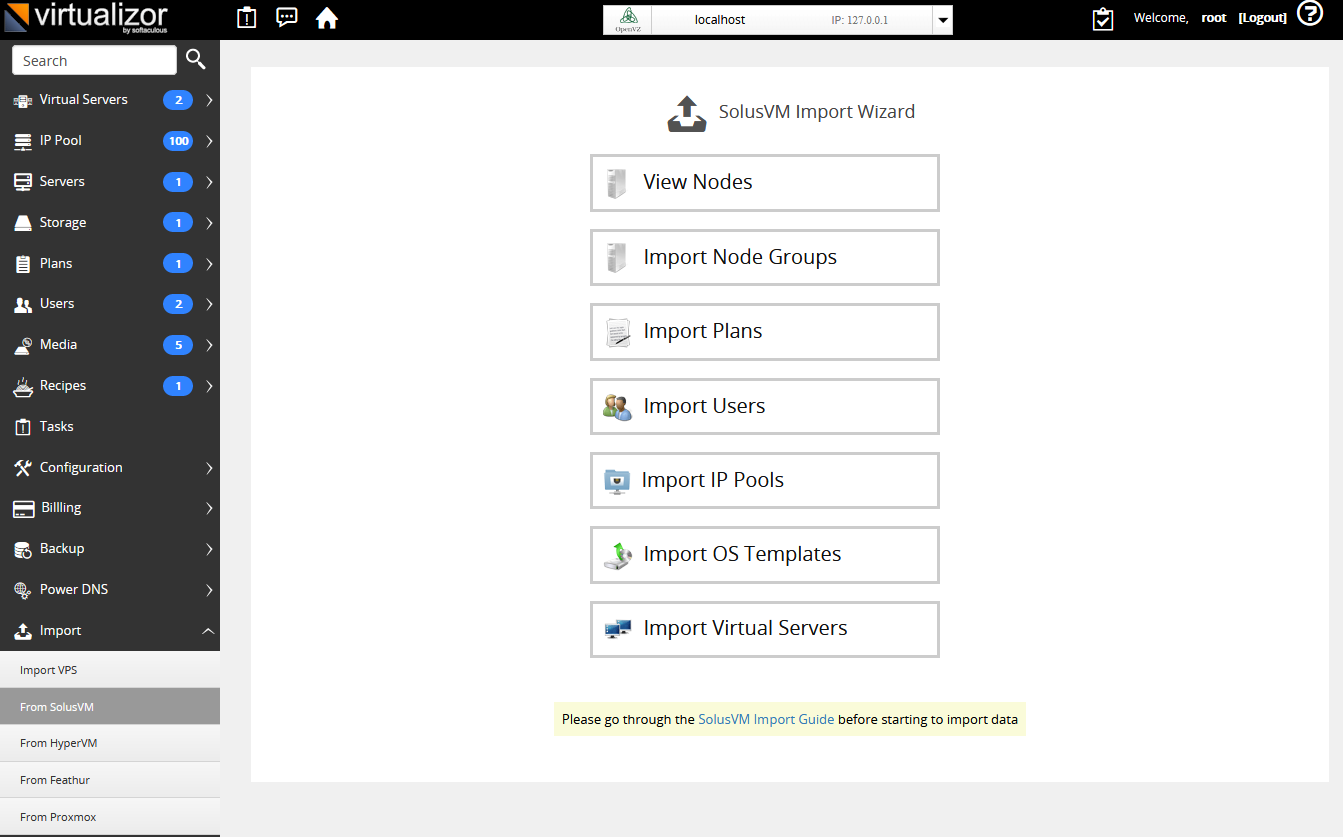
This utility doesn't import anything. Its just to check which nodes have been added.
You will see something like the following.

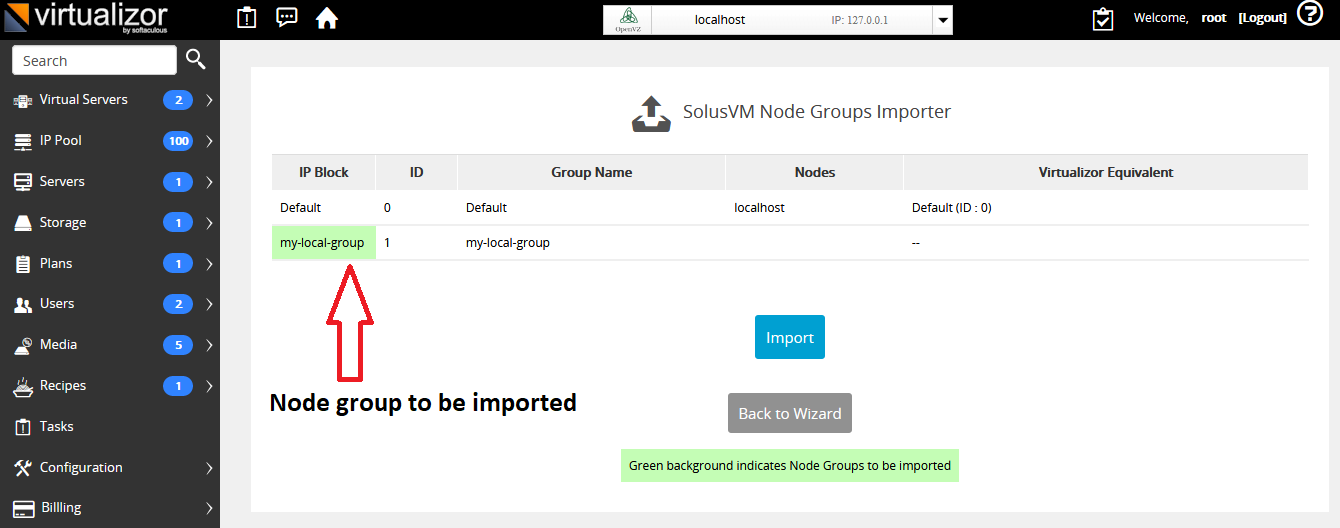
Import Node Groups
You will need to import the Node Groups.
Click on the Import Node Groups utility.
You will see something like the following.
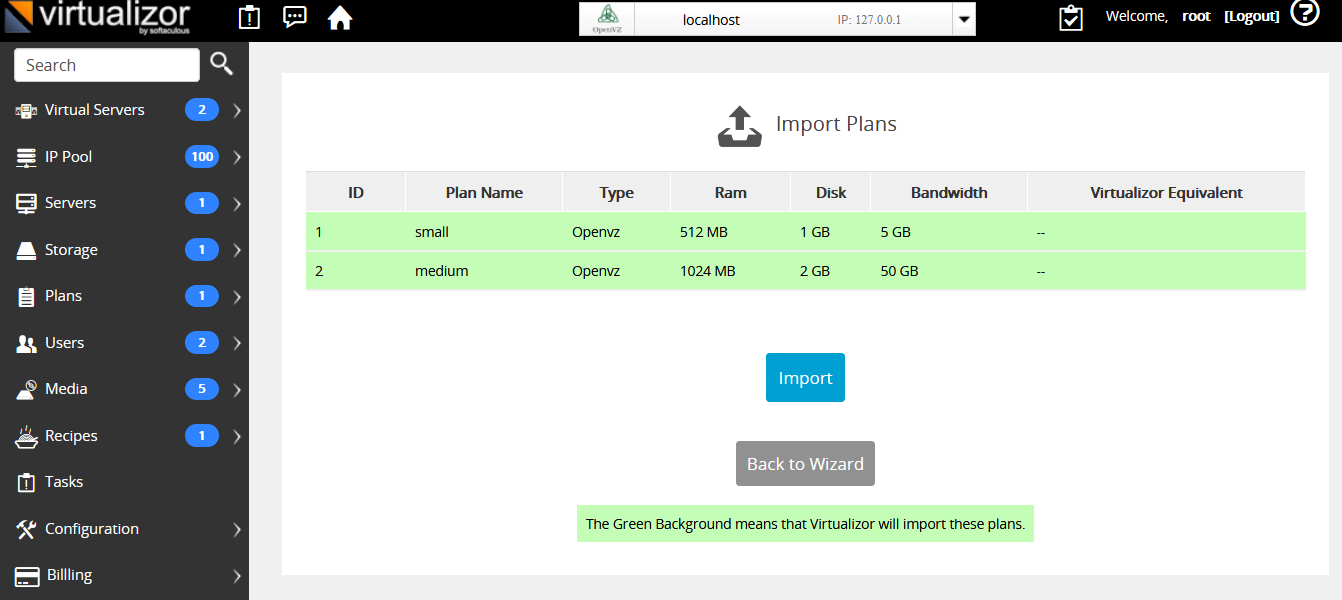
Import Plans
Click on the Import Plans utility.
You will see something like the following.
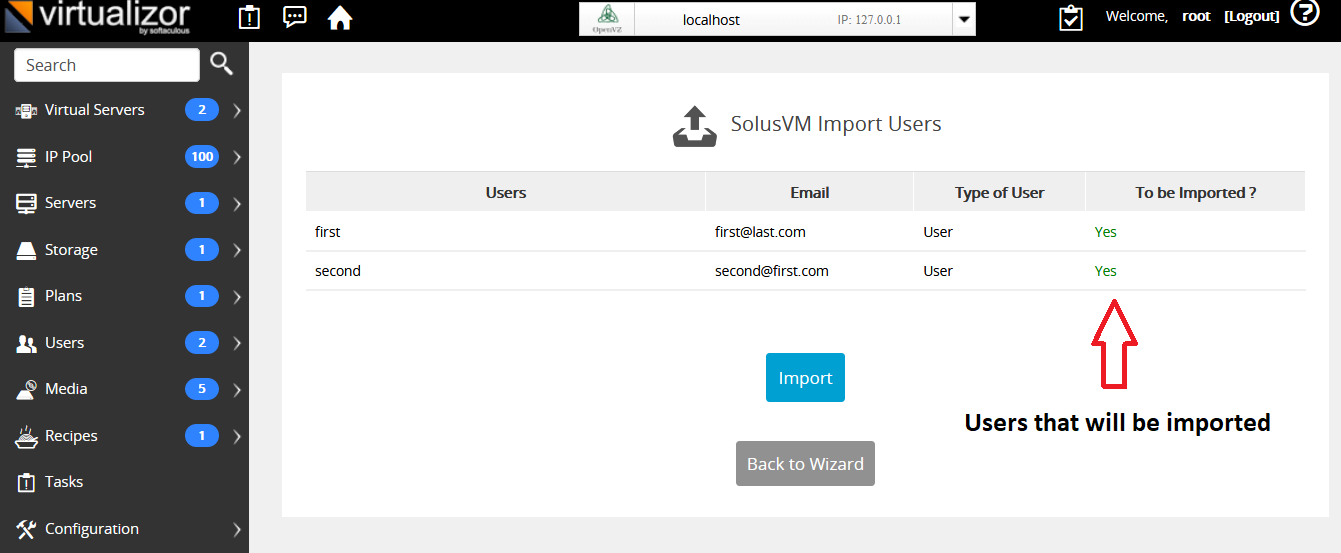
Import Users
Click on the Import Users utility.
You will see something like the following.
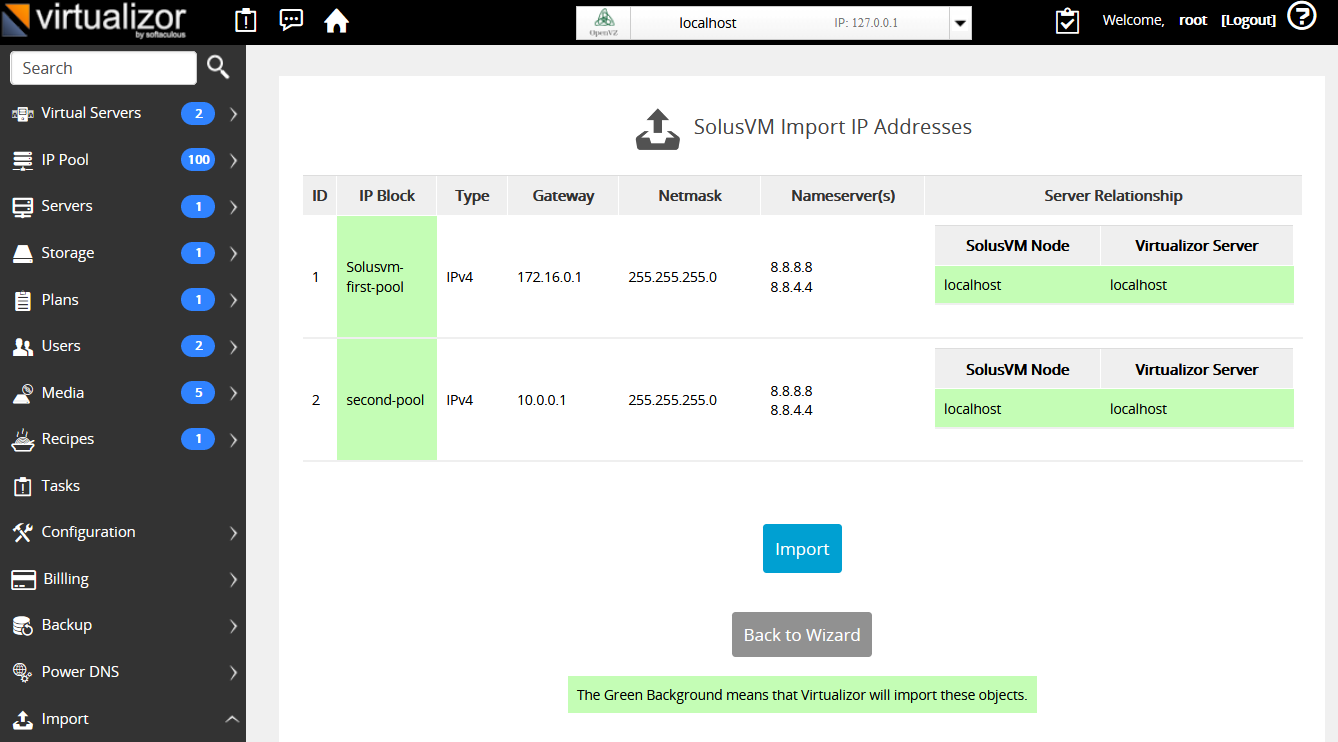
Import IP Pools
Click on the Import IP Pools utility.
The IP Pool Node relationships will be maintained.
Even IPv6 Pools and IPv6 Subnets will be imported.
You will see something like the following.
Import OS Templates
Click on the Import OS Templates utility.
You will see something like the following.
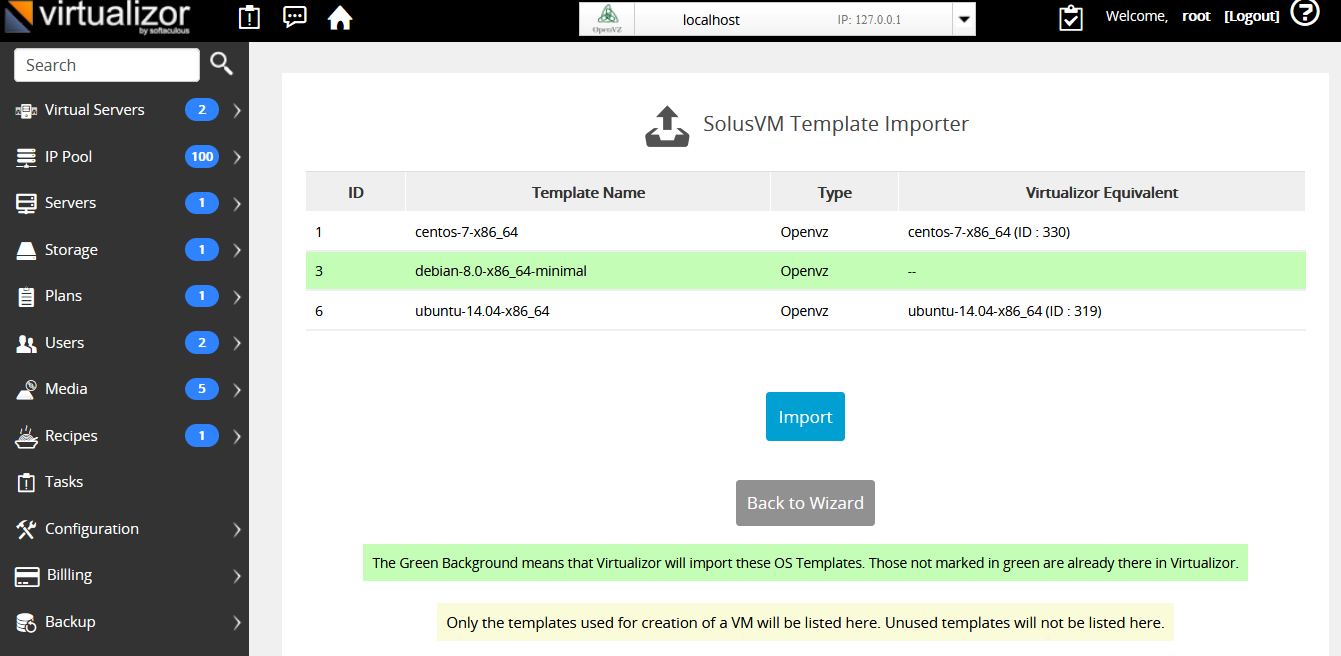
- Virtualizor provides pre-created templates, which you can browse and download from [Admin Panel] > [Media] > [Template Browser] by selecting the Virtualization type and OS template distribution type.
- If you do not find any equivalent templates in Virtualizor's OS [Template Browser], then you can add custom OS templates by following guide mentioned at Add_OS_Template.
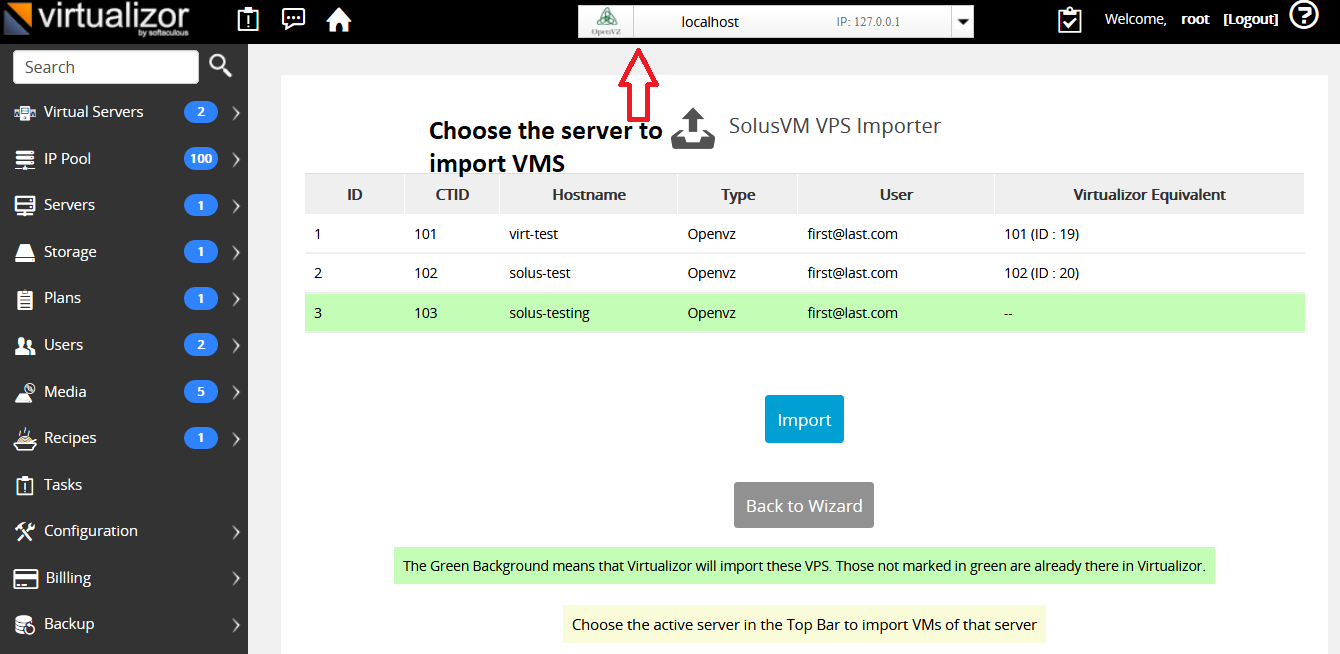
Import VMs
Finally, lets import the VMs.
Click on the Import Virtual Servers utility.
You will have to run this wizard for each slave by choosing the Active Server.
PDNS Add Server
If your SolusVM master has pDNS server(s) for Reverse DNS or regular DNS, you can also add them to Virtualizor.
You simply need to add the pDNS Master Server to Virtualizor.
All users who had their DNS entries will be able to edit them via Virtualizor as well as we have support for the same.
WHMCS Converter
You can convert all SolusVM orders into Virtualizor orders as Virtualizor maintains the same VPS ID as in SolusVM during Import.
Your users will simply notice a new UI in WHMCS after the conversion.
This WHMCS converter works converts one SolusVM product and its orders at a time.
Download
Download the SolusVM to VirtualizorWHMCS Converter
For PHP 5.3+ to PHP 5.6 HERE. (Updated on 15/05/2017)
For PHP 5.6+ to PHP 7.0 HERE. (Updated on 19/05/2017)
For PHP 7.1+ HERE. (Updated on 29/12/2020)
For PHP 8.1+ HERE. (Updated on 03/03/2023)
Create a directory solusvm_converter in your /path/to/whmcs/ Directory.
Unzip the downloaded zip in the solusvm_converter directory which you created.
Please make sure that the upload was done properly and the following folder exists :
/path/to/whmcs/solusvm_converter
Add the Virtualizor Master
You will need to Add the Virtualizor master server in WHMCS for this utility to work.
You will also need to create a Server Group and add the Virtualizor Server to the group.
The procedure to add a Virtualizor Master server to WHMCS is the same as documented in the
WHMCS Module -> Adding Server to WHMCS
Run Converter
To run the converter you need to access http(s)://ip-or-hostname/solusvm_converter
We recommend you let the converter create the Product (and you should create the Product Group before hand).
When this utility will create the Virtualizor Product it will copy the SolusVM Product and also its pricing.
It will also use the same SolusVM configurable options so that the user can manage that as well.
When you run the converter, it will list the SolusVM WHMCS Products.
You will need to choose the Product which you would like to convert.
The converter will not modify the SolusVM Product but will instead modify the Hosting Orders of the SolusVM Product.
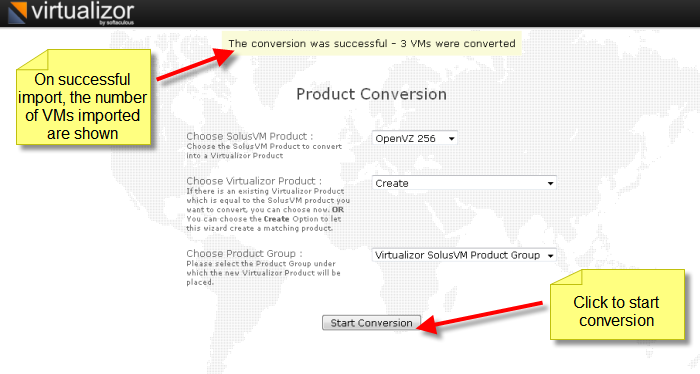
So lets start, you will see the products listed. After choosing the product to convert, click on Load Data

You would have two options to convert :
- Either choose an existing Virtualizor Product you have created before
- Let this converter create the Virtualizor product for the SolusVM Product you are importing.
Based on your preference choose the appropriate options. Then click on Start Conversion
Verify
Now verify that all data has been imported successfully.
Welcome to the Virtualizor family.
Support
We would be happy to help you migrate. Please contact the Virtualizor Team to help you migrate.
Errors and solutions
- In case you get an error "The server group could not be found" in WHMCS converter utility, please check Server Group is added to SolusVM Products. If not then add the server group to SolusVM product and try to convert that product again.
- If you get the following error :
The Plan could not be found in Virtualizor. Did you import all SolusVM plans from the SolusVM master into your Virtualizor Master ?
