
Re-install Server OS without VPS data-loss
Introduction
This blog will help you to re-install OS on 1st/primary disk while retaining VPS disks in 2nd/secondary disk(s).
Whether LVM based or File Based is there on 2nd disk, the data will be retained upon OS re-installation.
This blog will also work when you are planning to upgrade server's OS for a slave server, assuming you have not removed the server from Master/Primary panel.
Disaster recovery guide will be helpful upon successful OS installation on the server.
https://www.virtualizor.com/docs/faq/disaster-recovery/#scenario-2-master-slave-cluster
Current Setup
My current setup has Ubuntu 20.04 installed and I am planning to change OS to Ubuntu 22.04.
This is my stand-alone Master Virtualizor setup with no secondary/slave servers attached to it.
My current setup has 2 disks where primary disk (vda) has 3 partitions and 3rd partition (vda3) is holding LV for root which has OS in it.
The secondary disk (vdb) has a Volume Group (vps) and an LV (data) mounted on /vps for File based storage purpose.
Below the screenshot for better understanding :
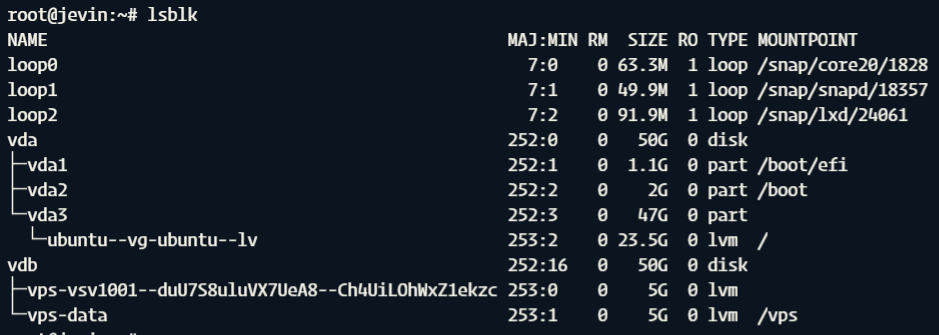
Your setup may either contain Volume group from the secondary disk or might be mounted for file based storage. For example purpose I have setup both the storage (LVM + File based) from secondary disk.
New setup
Now the new OS installation can be made on the primary disk by loading its ISO and choosing the partitions needed to be formatted.
Before that, you can use this guide to backup the data required to bring back the stand-alone master Virtualizor setup :
https://www.virtualizor.com/docs/faq/disaster-recovery/#scenario-1-stand-alone-master-server
Restoring the VPS disk backup wont be required since OS re-installation will not touch that disk.
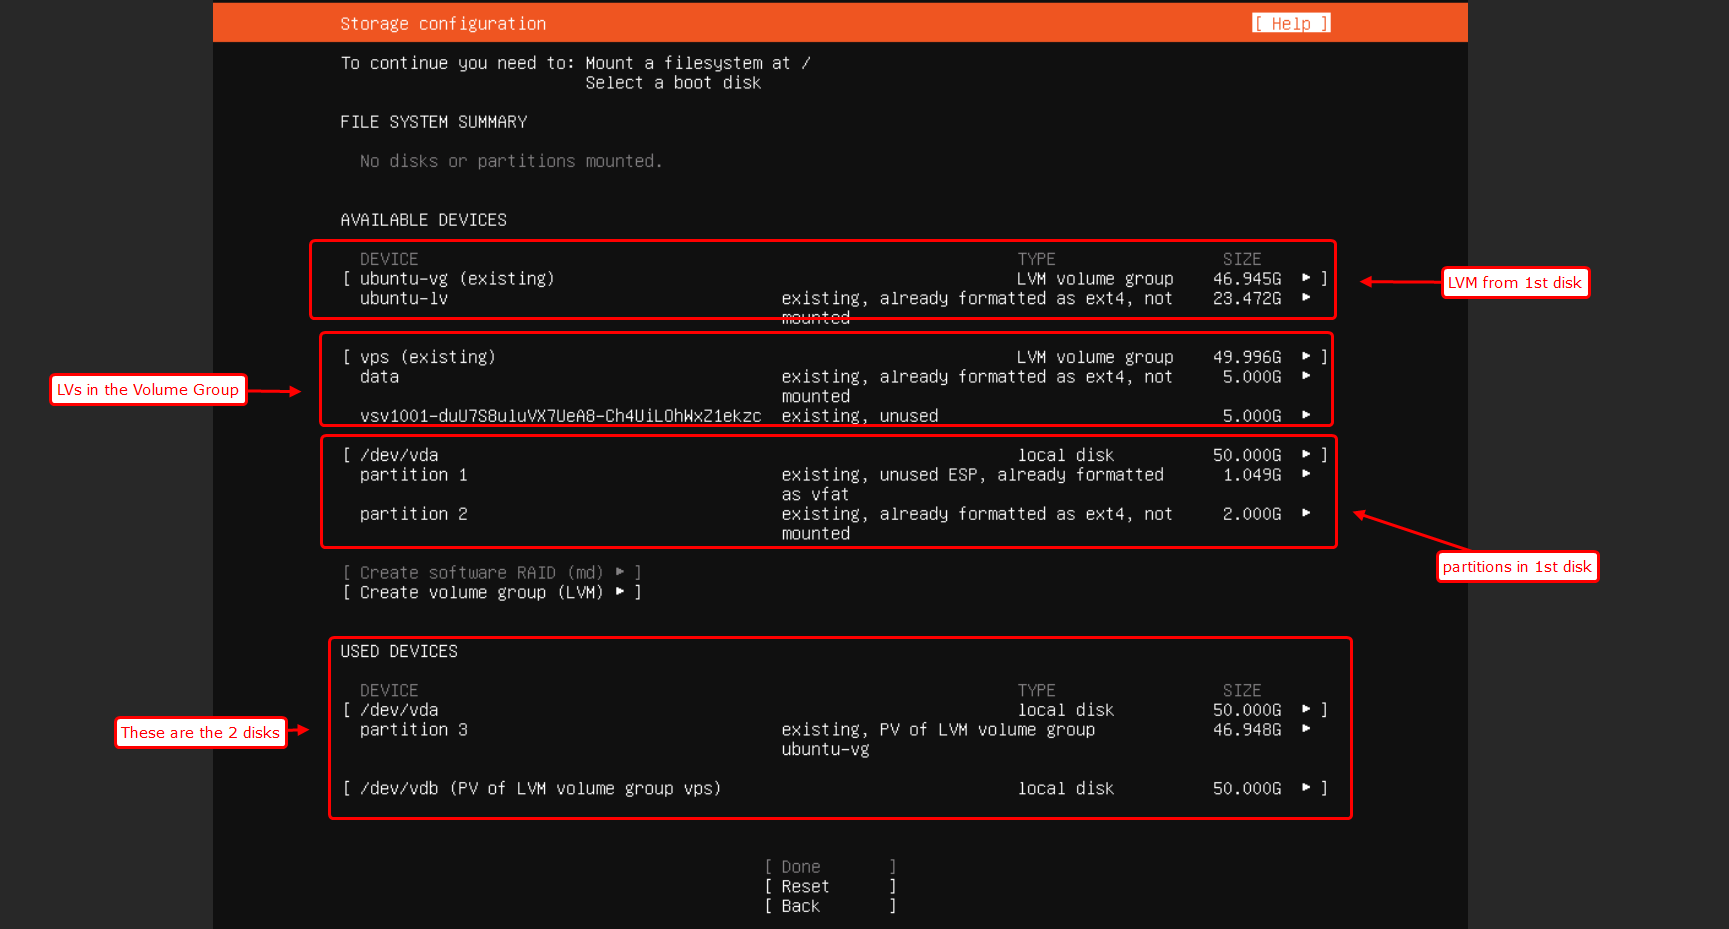
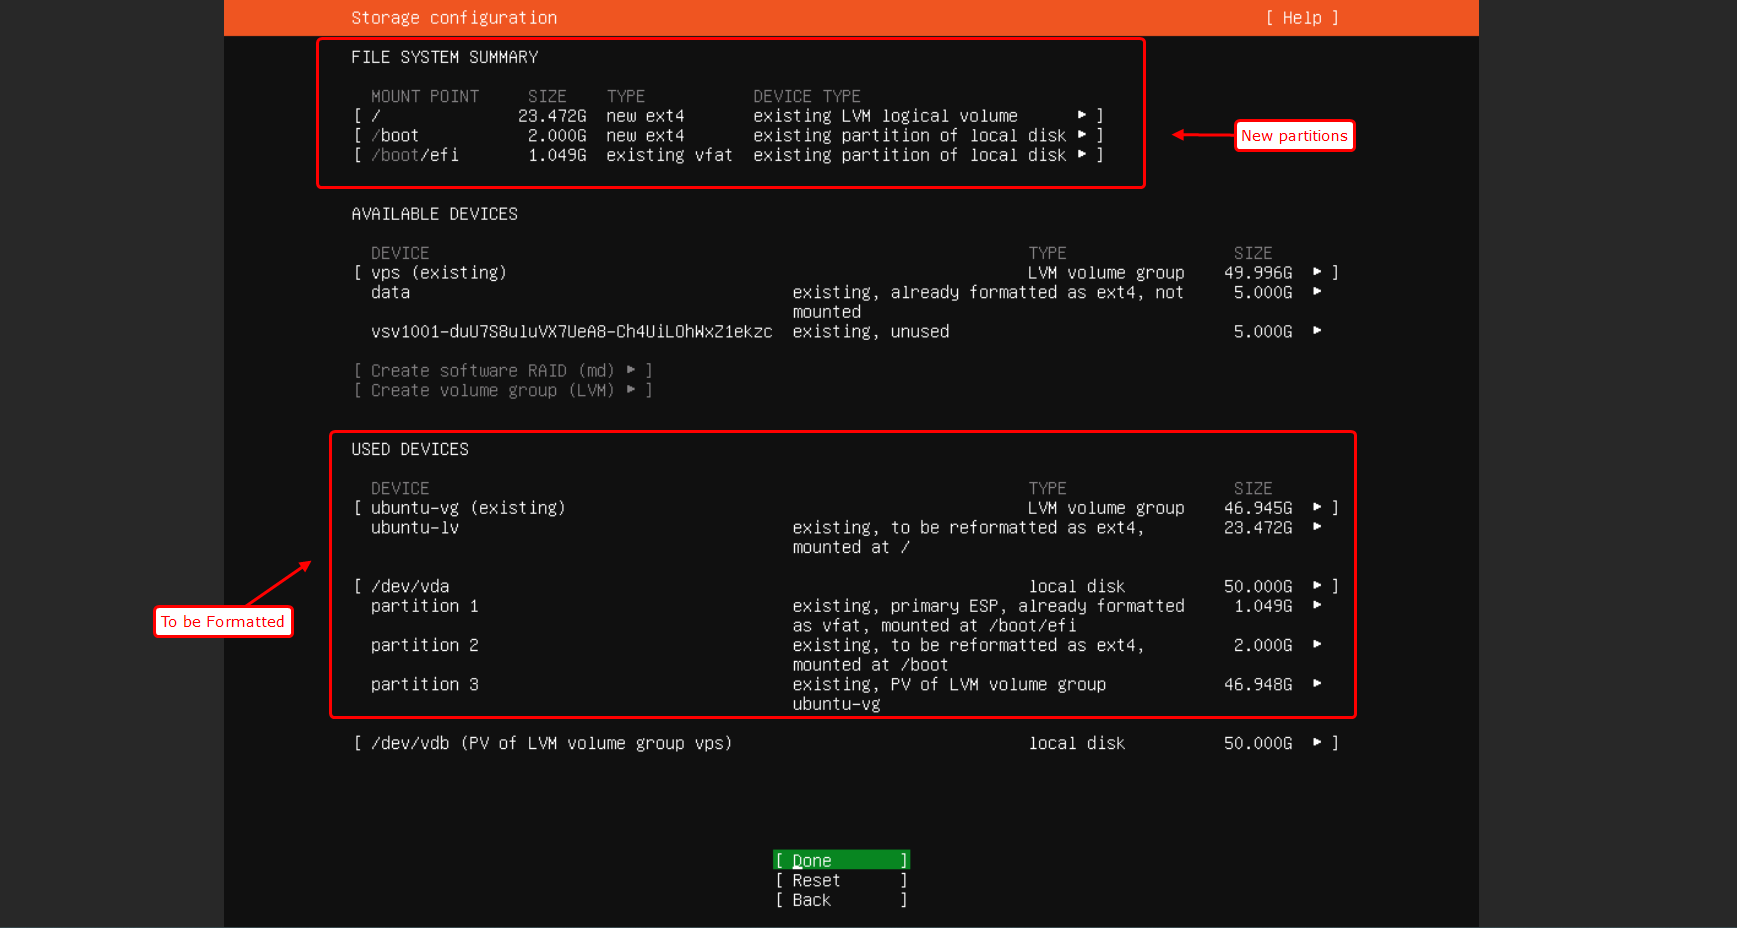
1. Upon booting the ISO, choose custom storage layout so that you can choose what to format :

This will load the partitions and allow to re-format existing ones.
The following image will show the partitions.
2. Now we will format the vda1 partition and use it as boot device :

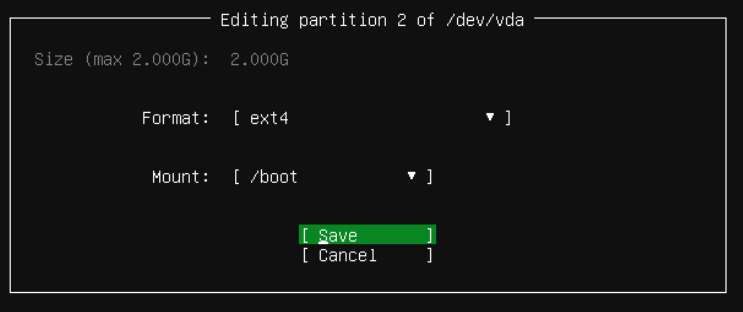
3. After that you can choose to format the 2nd partition and use it as ext4 for /boot :

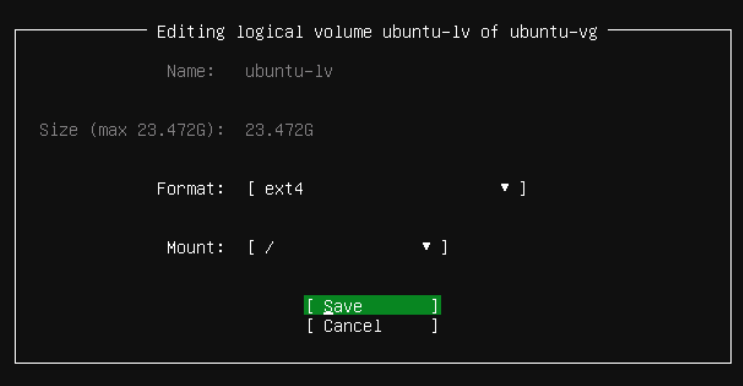
4. Then you can proceed with formatting vda3 for using it as ext4 on '/' :

This should format all the partitions from vda / primary disk and the secondary disk would be untouched.
The following image would help understand the final partitions.
Rest of them would be untouched since they are from secondary disk which contains VPS named Volume Group used for .
You can then proceed with regular OS installation steps.
Upon successful OS installation, you can proceed with disaster recovery guide based on your setup whether its stand-alone Master panel or secondary/slave server.
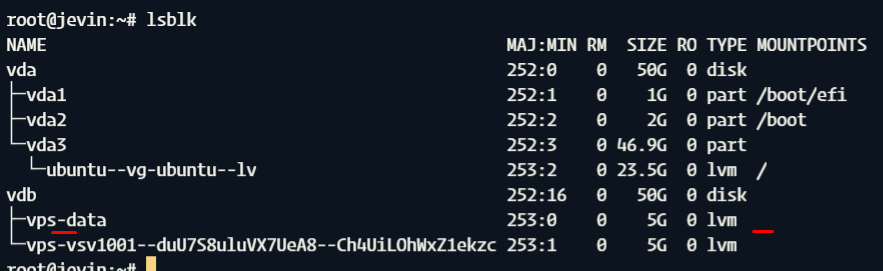
The following image shows the LVM from 2nd disk which remained intact the only difference being, that the data LV was not mounted.
This will require manually mounting it back to /vps and it would still be holding VPS disks like it was before re-installing the OS.
Final words
This blog was intended to give an idea about re-installing OS and still keeping the VPS disks intact.
Your setup may vary like having only one disk or having the disks in raid or having the VPS disks in the same partition as of the root ('/').
The above example was chosen since that is the standard practise to keep the VPS storage present on a separate disks.