You can add multiple storages on panel with different storage type on panel except for Openvz and Openvz 7.
Cloning and template creation will depend on the storage type used by the vps.
 LVM Based Storage
Create Storage
This example creates an LVM logical volume called new_logical_volume
that consists of the disks at /dev/sda1, /dev/sdb1, and /dev/sdc1.
Step 1: Creating the Physical Volumes
To use disks in a volume group, you label them as LVM physical volumes.
Warning :This command destroys any data on /dev/sda1, /dev/sdb1, and /dev/sdc1.
Physical volume "/dev/sda1" successfully created
Physical volume "/dev/sdb1" successfully created
Physical volume "/dev/sdc1" successfully created
Step 2: Creating the Volume Group The following command creates the volume group vg1.
Volume group "vg1" successfully created
You can use the vgs command to display the attributes of the new volume group.
VG #PV #LV #SN Attr VSize VFree
vg1 3 0 0 wz--n- 51.45G 51.45G
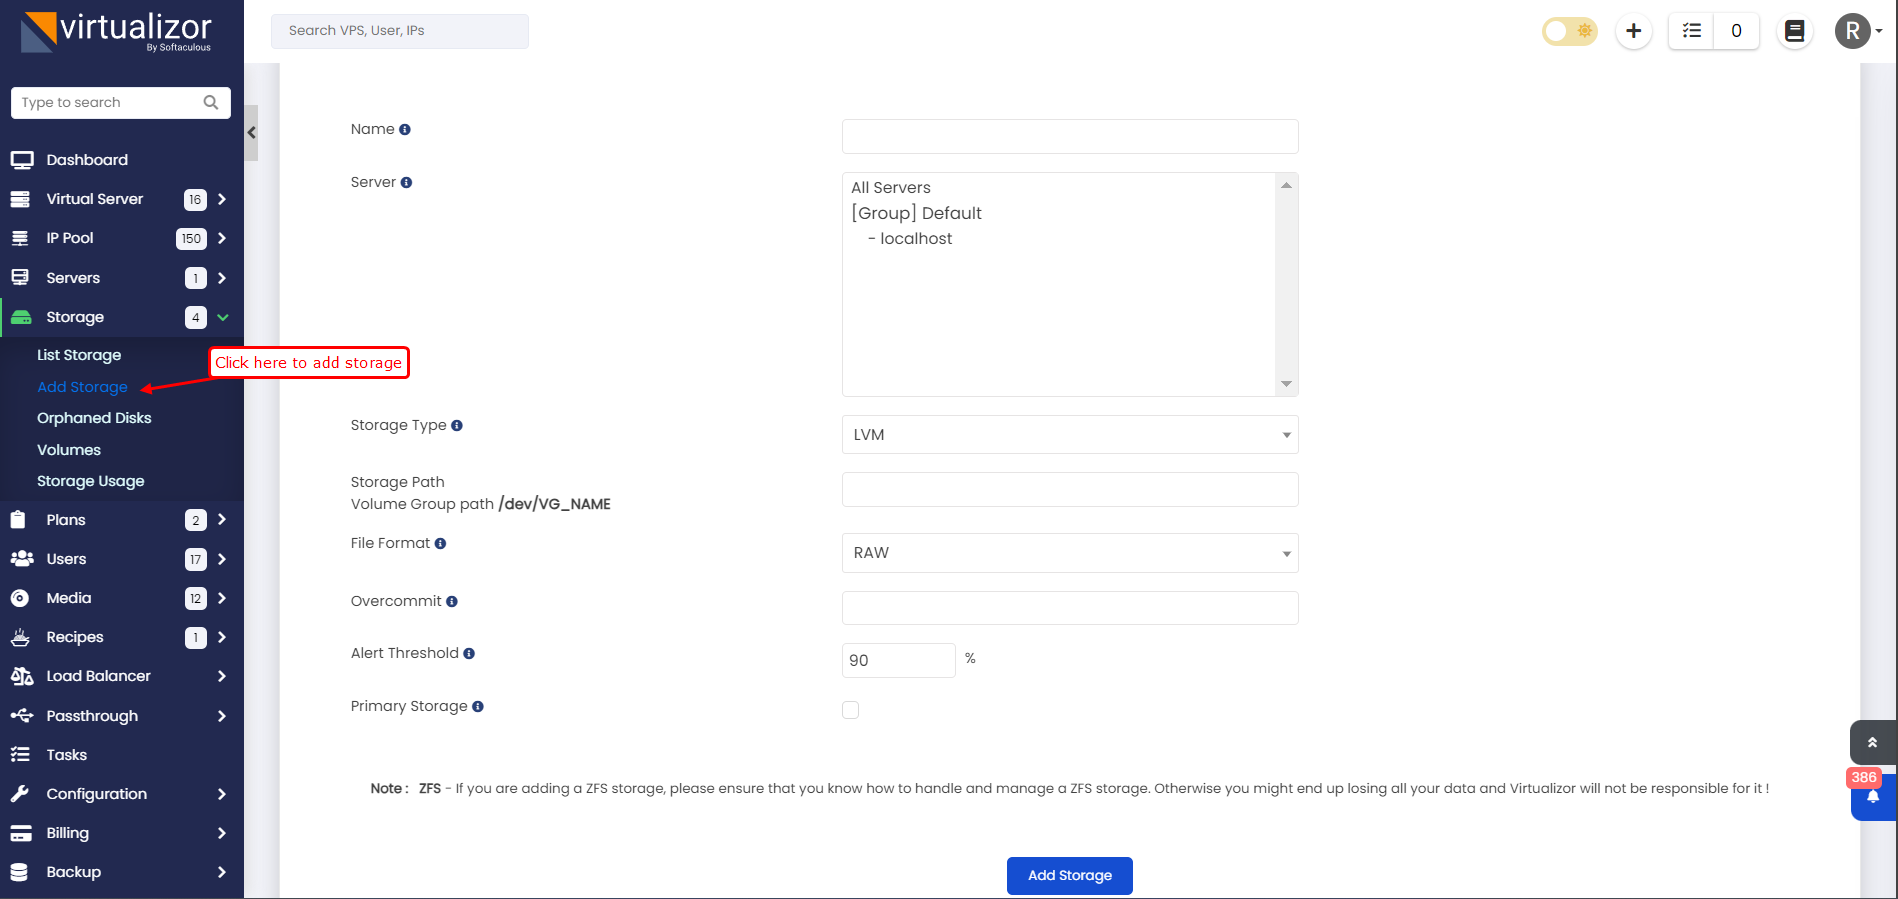
Add Storage

After creating the Storage you will need to add it on Virtualizor panel.
Storage Type : Storage type should be LVM.
Path : In case of LVM please specify the Volume Group path /dev/VG_NAME.
File Based Storage (RAW/QCOW2)
Create Storage
You will need to create the storage before adding it in Virtualizor.
You will just need to create a folder on the target node :
To avoid this, it's better to mount VPS storage on a separate directory, ensuring the root partition remains stable and the system performs optimally.
Add Storage

After creating the Storage you will need to add it on Virtualizor panel.
Storage Type : Storage type should be File.
Path : Path should be the full name of the directory created in the previous step (/vms in this case) to store VMs disk.
File Format : You can choose the Format as RAW or QCOW2 for File
based storage.RAW has better performance but no overselling where as
QCOW2 supports overselling of Disk Space.
ZFS Storage
Virtualizor supports ZFS Storage.
You can follow the guide in the link below for configuring and adding ZFS Storage in Virtualizor.
https://www.virtualizor.com/blog/docs/installations/zfs/
Thin LVM Based Storage
Thin LVM allows you to create thin provisioned disks for your VMs.
Create Storage
You will need to create a Thin Pool on the main node from an already existing Volume gorup.
In the following example we will be creating a thin pool of size 100GB in the Volume group "MyVolumeGroup".
You will just need to create a folder on the target node :
Add Storage
After creating the Storage you will need to add it on Virtualizor panel.
Storage Type : Storage type should be Thin LVM.
Path : Path should be the full path of the thin pool
/dev/VGName/THINPOOLNAME.If we consider the above example then the path
will be "/dev/MyVolumeGroup/thin_pool".
Ceph Block Storage
Create Storage
Follow the below guide to create ceph storage cluster:
https://docs.ceph.com/en/octopus/install/ceph-deploy/quick-ceph-deploy
To create ceph block device refer to below guide:
https://docs.ceph.com/en/latest/start/quick-rbd/
Add Storage
After creating ceph block you will need to add it on Virtualizor panel.
Storage Type : Storage type should be Ceph Block Device.
Ceph Pool Name : Ceph Pool Name should be the ceph block device configured on the ceph cluster example "rbd".

Ceph File System
Create Storage
Follow the below guide to create ceph storage cluster:
https://docs.ceph.com/en/octopus/install/ceph-deploy/quick-ceph-deploy
To create file system refer to below guide:
https://docs.ceph.com/en/latest/cephfs/createfs/
To mount file system with kernel driver refer to below guide:
https://docs.ceph.com/en/latest/cephfs/mount-using-kernel-driver/
Add Storage
After creating ceph file system you will need to add the mount path in Virtualizor panel.
Storage Type : Storage type should be File.
Path : Path should be absolute path on which the ceph file system is mount example "/home/cephFile".

Lightbits storage
Add Storage
Storage path : /dev/disk/by-id/uuid
Lightbit project : Lightbits storage project name