Overview
Do you want to resell Virtualizor licenses from WHMCS?
This guide will help you setup the WHMCS licensing module to resell Virtualizor Licenses. Setting this up is very easy
Download and Upload
Download the Module from the following links :
Virtualizor Licensing.zip.(Updated on: 08-05-2025)(Version - 1.0.0)
Unzip it and upload the files virtualizor_licensing.php and noc_api.inc to the following path /path/to/whmcs/modules/servers/virtualizor_licensing/
Edit a Product / Service
This guide assumes you have already setup WHMCS and created your product. You can find detailed guides on the WHMCS Wiki. Once the Product is setup, you can move ahead with setting up the Virtualizor Licensing Module.
Setup Module
This option can be found while editing the Product/Service in Module Settings Tab.
- Select the Module Name as Virtualizor.
- Enter the Softaculous NOC account details i.e. Softaculous Username and Softaculous Password. These details are required as the licenses will be issued under this account.
- Now choose the option when you want the module to be executed. Just remember that Virtualizor license will be issued as per the method you select to execute the module.
Custom Fields
License IP - The License IP field is required to assign the License
License Key - License Key is required to store the license key assigned to the License IP (Not required on order form)
License ID - License ID field is required to store the ID of the license. (Admin only and not required on order form)
Number of VPS - License for how many number of VM you want to purchase. (Required on order form)
Configurable Option
License Type - This field is to provide an option for different types of licenses.
License Type values can be as follows:
1 - Premium
2 - Professional
3 - Professional + Backuply
4 - Premium + Backuply

Testing the Setup
You can test the setup by making a DUMMY Order and going to the settings of that order.
Make sure the License IP is setup as desired.

Then click on the "Accept Order" button to create the account on the server.
You will see a Box shown in the following image
Success Message
When the page reloads the following message will be shown in case of success :

Similarly you can test the Suspend, Unsuspend, Terminate, View License commands.
- In case of Suspend the Auto Renewals of the license will be cancelled (if any).
- In case of Terminate the license will be cancelled and if the license was issued less than 7 days ago the transaction will be refunded.
- In case of View License you will be redirected to Softaculous Client Center showing you the Virtualizor License.
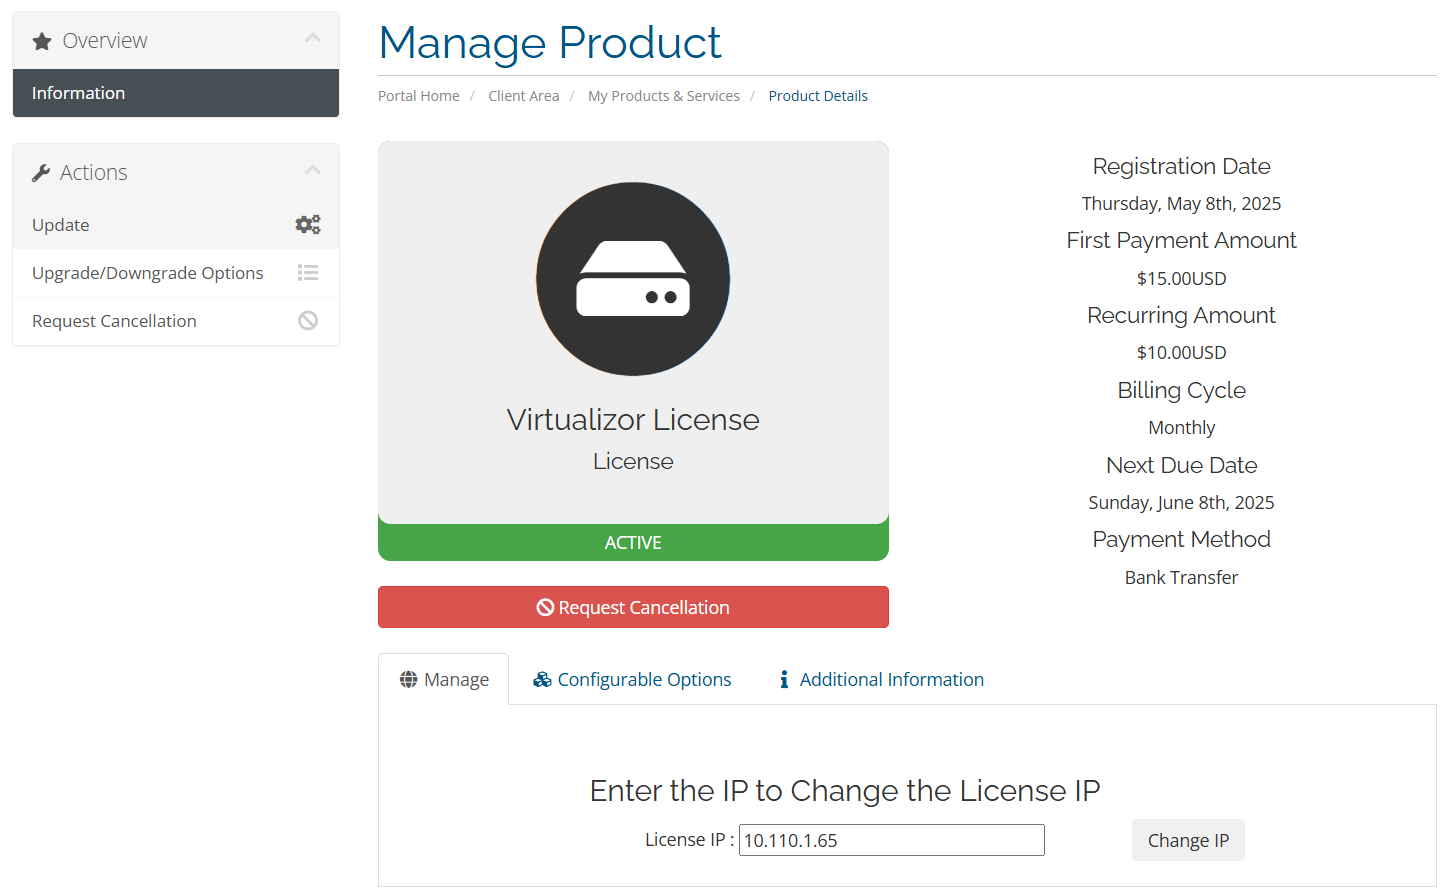
Edit IP
- Users can also Edit the IP from the Product details page.
- Enter the New IP and click on Change IP button.
- The IP will be changed in the Virtualizor records.
Support
If you need any assistance then please contact Virtualizor Support. Please send us a screenshot of the Order Form and the Custom Fields you added to the Product.