Overview
This page will explain the settings available for the Virtualizor billing module.
Billing Settings

Enable Billing - Will enable Virtualizor's inbuilt billing system. Users can self register and pay for VMs with this feature
Control Panel URL - The URL of this Control Panel which will be used in all user communication
Billing Day - The day of month when a invoice will be generated. By default its the last day of the month
Billing Currency - The currency to show the users
Currency Symbol - The currency symbol to show the users
Balance Warning Percentage - If not empty, when the current usage exceeds the user's balance percentage, a notification will be sent to the user
Minimum Amount - The minimum amount a user can pay towards balance
Maximum Amount - The maximum amount a user can pay towards balance
Registration Settings

Enable User Registration - Allows users allowed to register to create their Cloud Account
Default User Plan - When a new user registers, the default plan which will be assigned to the user. You can create User Plan from Admin panel -> Plans -> Add User Plan
Password Min Length - The minimum password length a user password should be
Enter Secret Key - This will enable recaptcha on cloud user registration, if blank captcha will be disabled, you will get keys from here: https://www.google.com/recaptcha
Enter Site Key - This will be your sitekey, For more details: https://www.google.com/recaptcha
SMS Settings

Enter SMS Gateway API URL - This URL will be used to send OTP while registration.
Enable SMS OTP for registration - If enabled then user will be asked for mobile number for SMS OTP verification while registration process
Default country code for SMS - Select which country code you want to append by default for SMS OTP registration
Company Details

Support Email - The Support Email to show users in all communications
Company Name - The name of the company who will be invoicing the users
Billing Address 1 - Billing Address Line 1
Billing Address 2 - Billing Address Line 2
Additional Billing Details - Additional Billing Details, like tax details and other information
Payment Gateways
We provide multiple payment gateway option which you can enable.
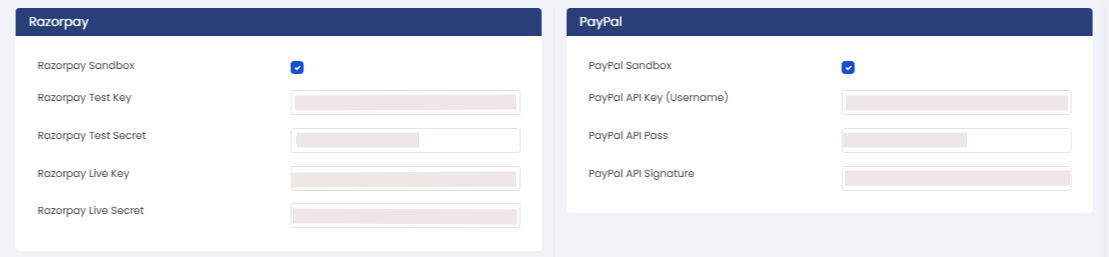
You will need to enable the gateway which you want to provide to your cloud user and click on "Save Settings".
Once
the gateways are enabled you will get fields for the enabled gateway,
fill those fields with correct values and click on "Save Settings".
Steps for PayPAl:
1. Get a business account on PayPal.
2. Enable API access for your account.
3. Activate IPN at: PayPal IPN Link
4. Copy the key details from the popup.
You can also integrate your own custom payment gateway.
To do so please go through the following guide : Integrate Payment Gateway