Overview
Softaculous Virtualizor supports Reseller / Cloud accounts. The Cloud accounts can create multiple VMs based on the resources assigned to their account. The Cloud Accounts can resell VMs in an automated manner. This guide is intended for Cloud Accounts who wish to sell VMs via WHMCS. WHMCS can be configured to create the VPS as soon as you accept the Order (Automatically or Manually). We provide a module for WHMCS to enable you to do so. Setting it up is really easy. You can create, delete, suspend a VPS with this module.
Download
Download the Virtualizor WHMCS Cloud module (2.3.0) from HERE (Last updated : 09 Sept, 2024).
Unzip it and upload the folder virtualizor_cloud (the folder itself), in your /path/to/whmcs/modules/servers/ Directory.
Please make sure that the upload was done properly and the following folder exists :
/path/to/whmcs/modules/servers/virtualizor_cloud
Features
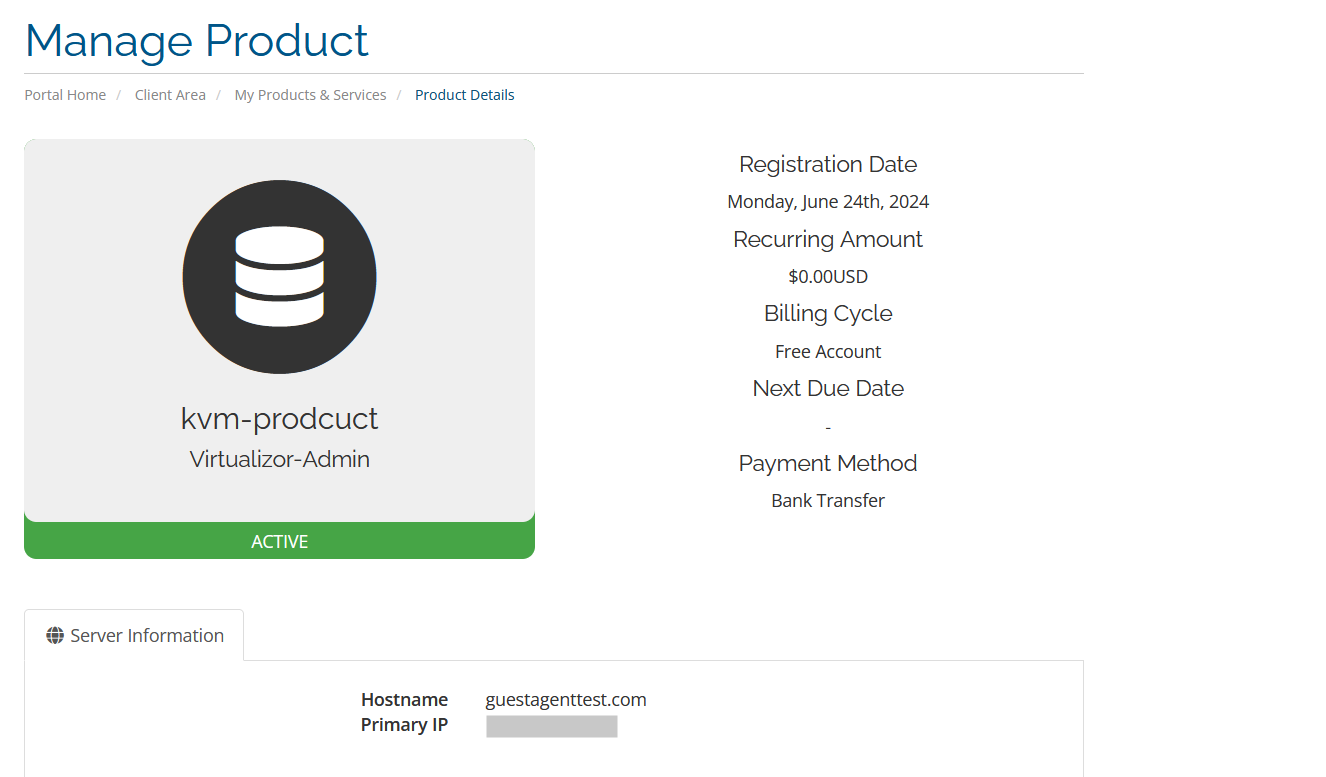
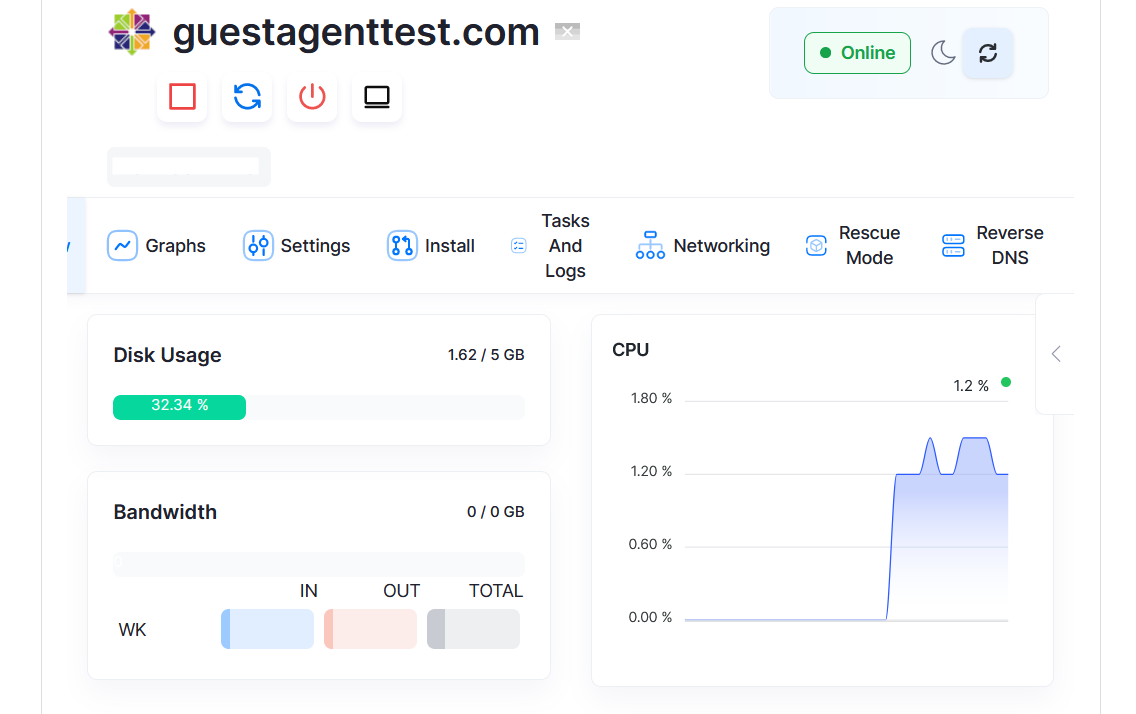
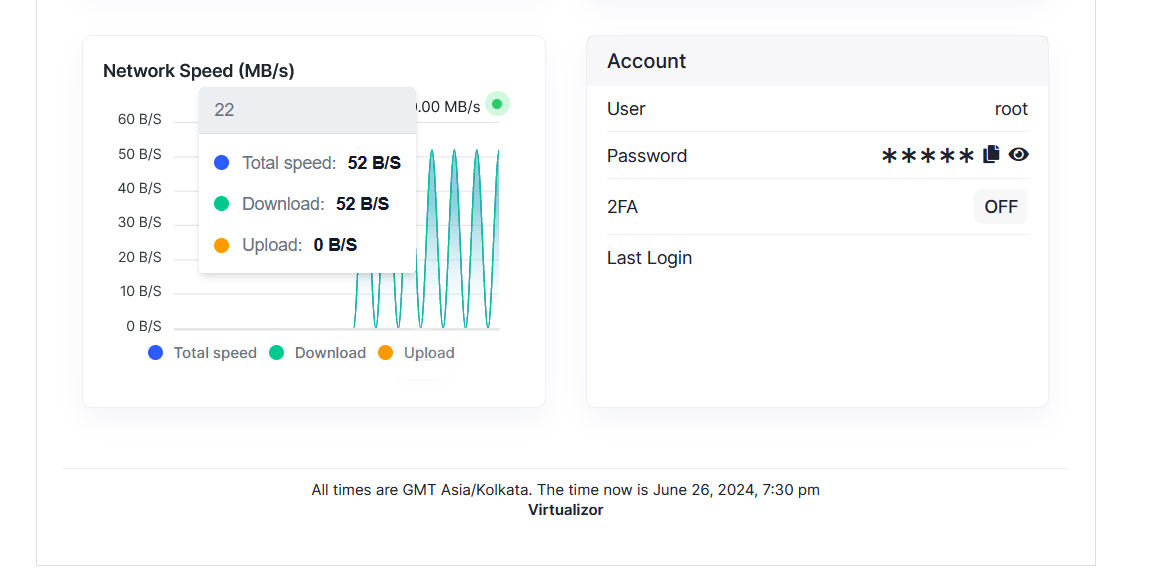
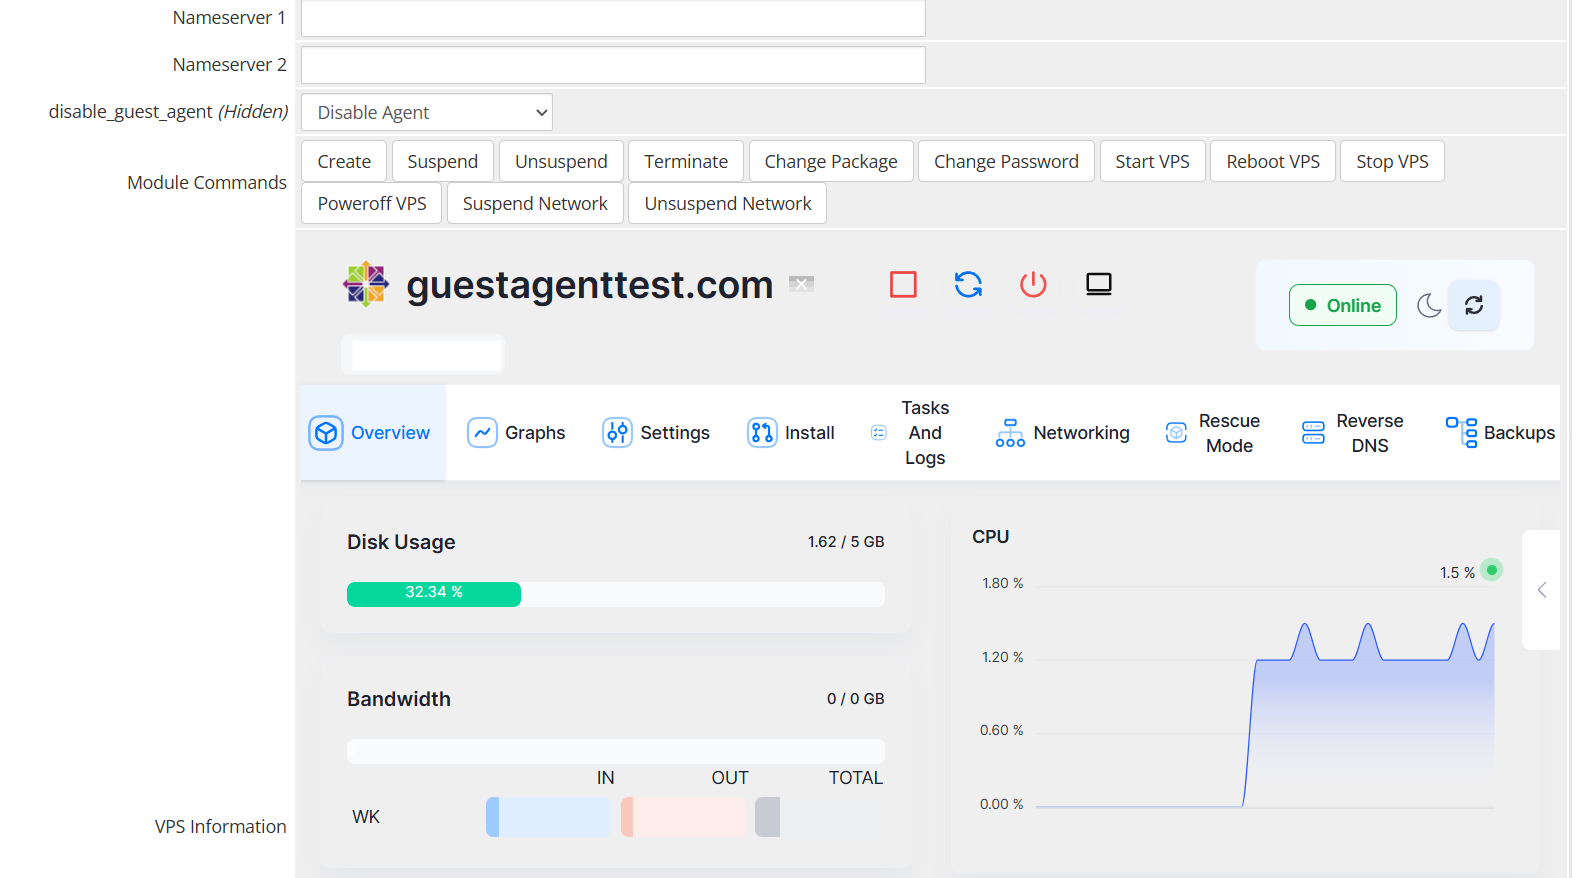
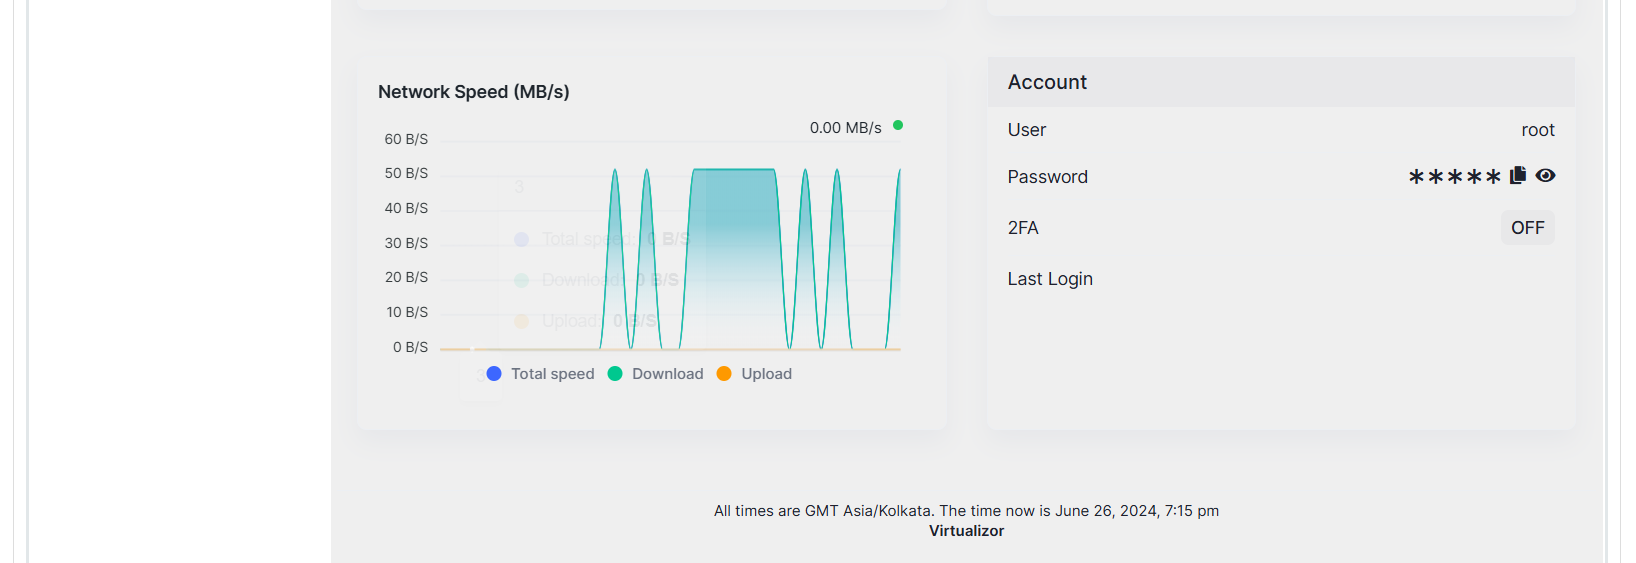
VPS Information View in WHMCS Client Panel
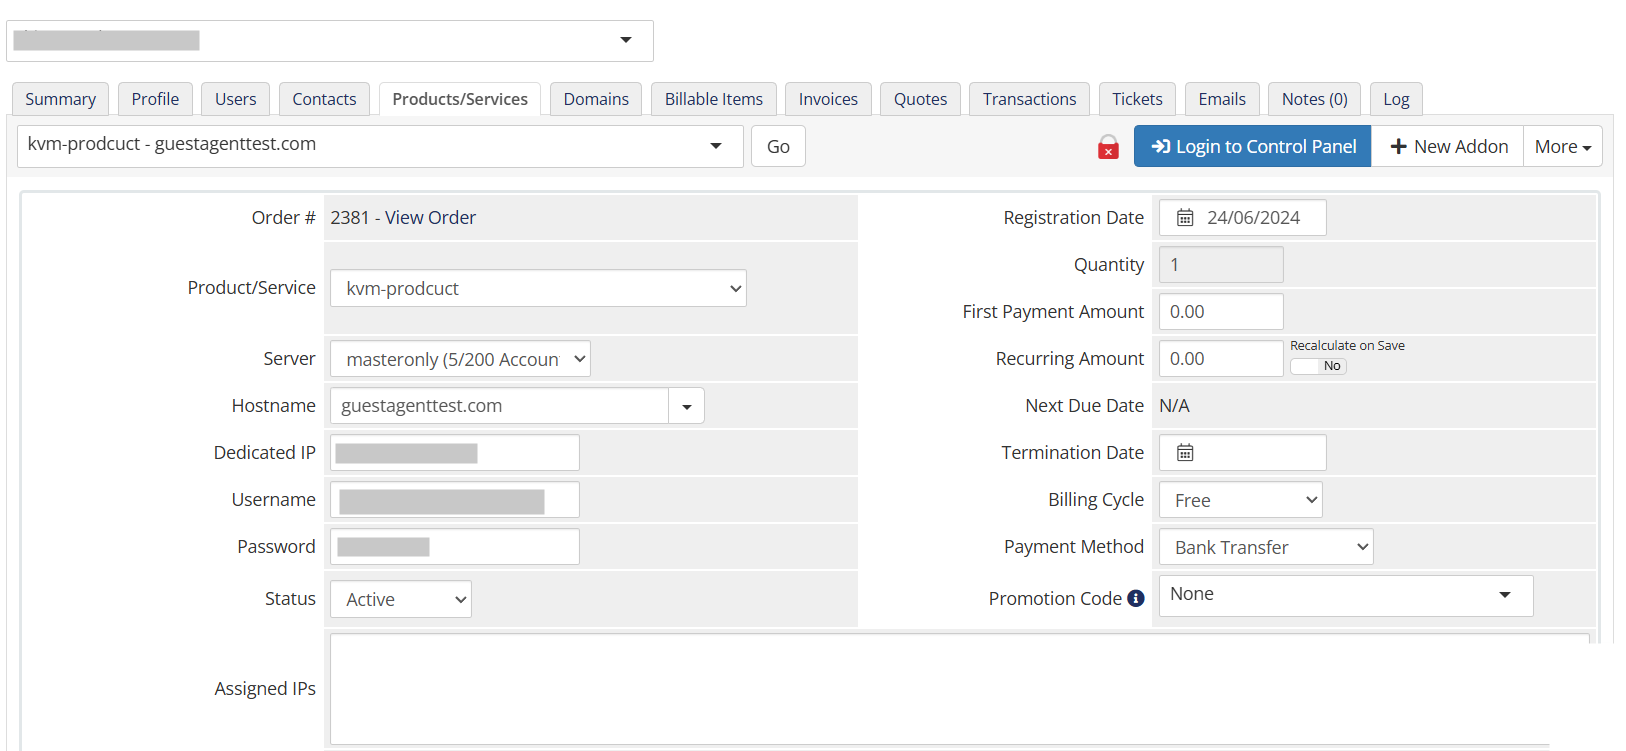
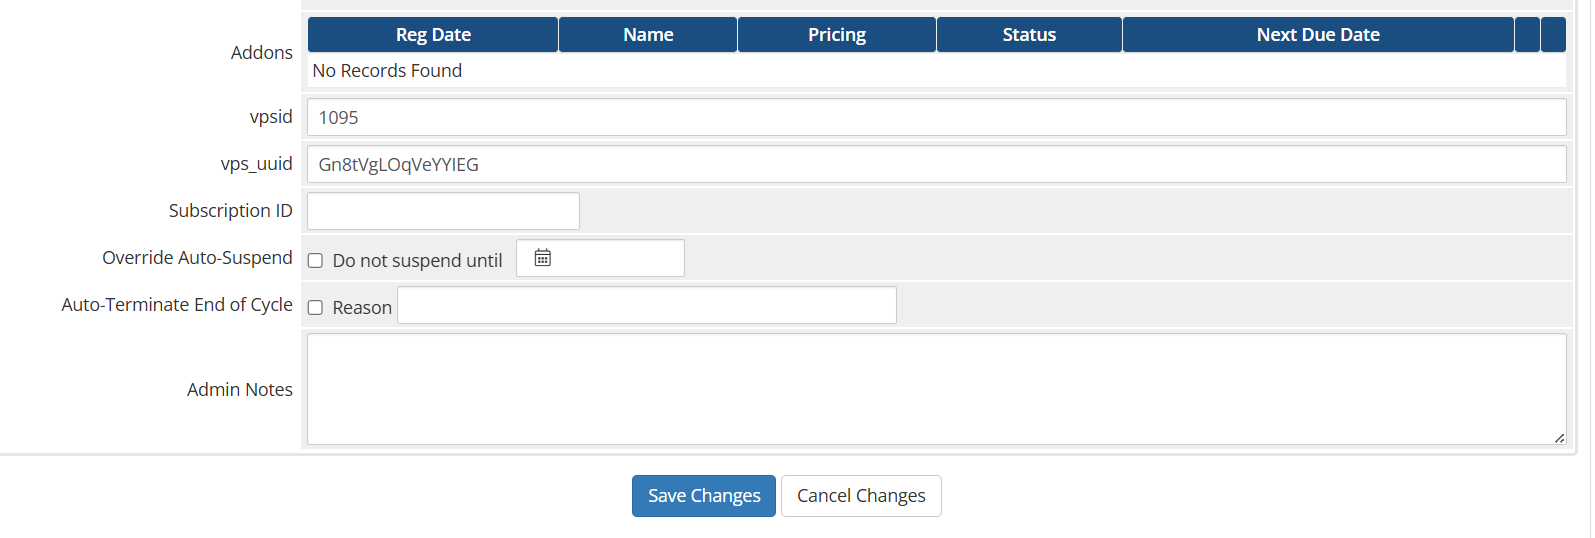
VPS information View in WHMCS Admin Panel
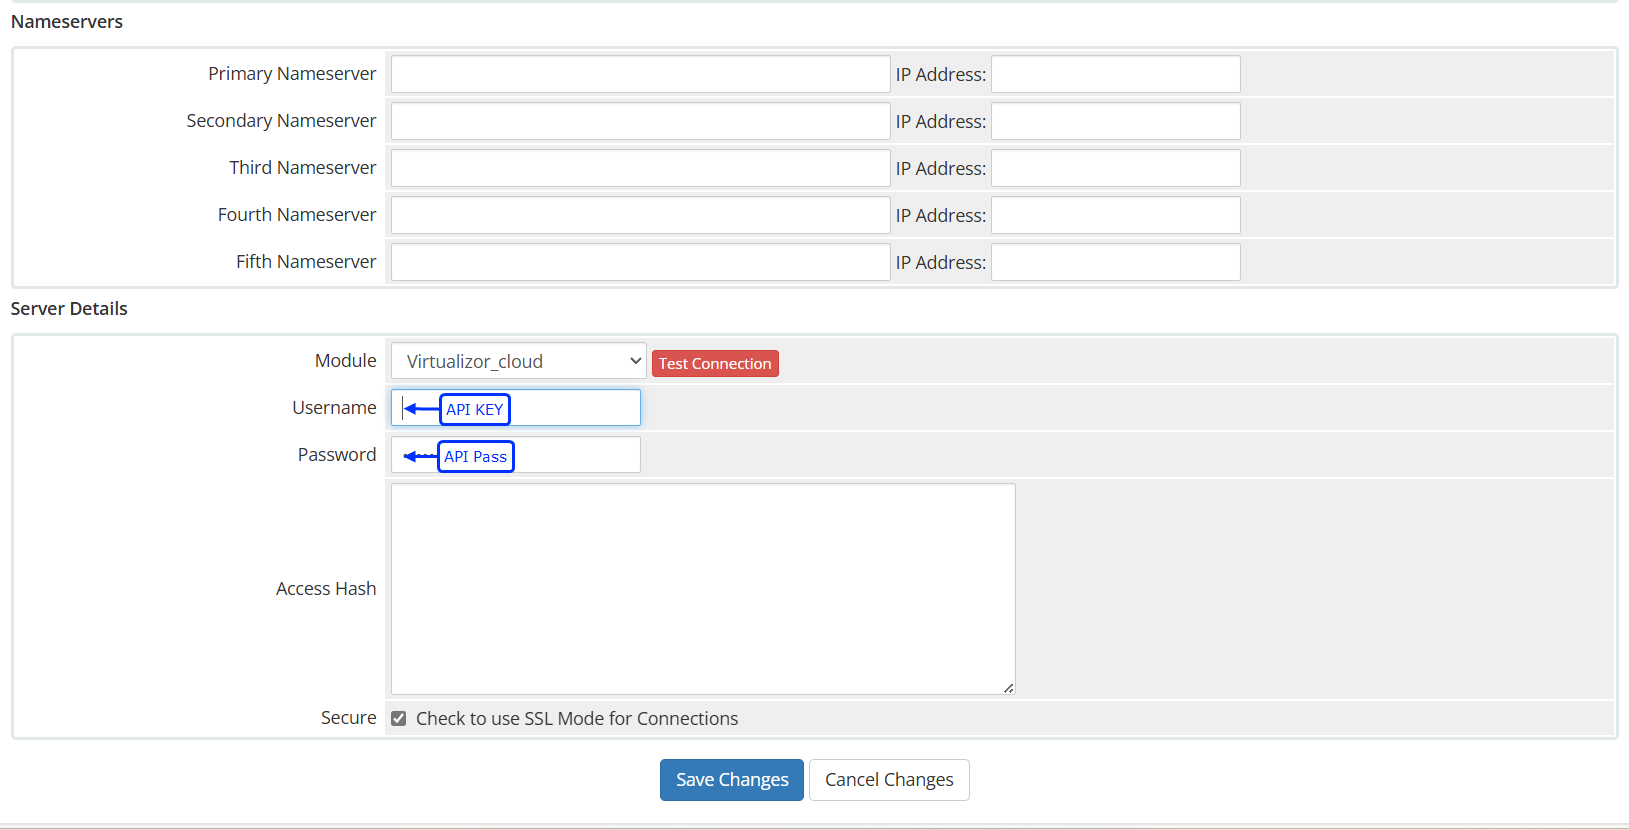
API Key
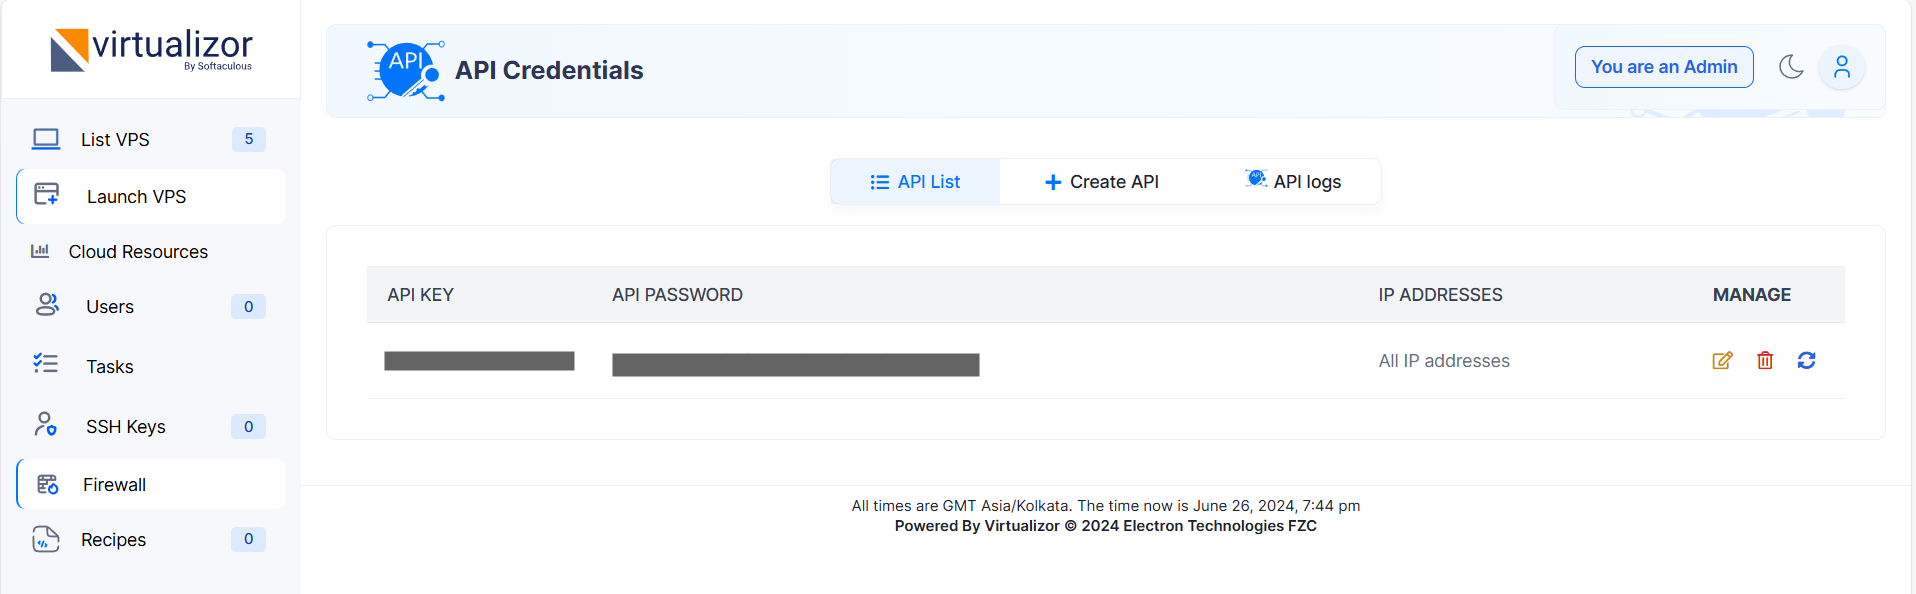
Virtualizor can generate a Unique Key and Password to make API calls to the Virtualizor Master.
You will need the API Key and Password to add the server to WHMCS.
This information can be found from the Virtualizor Cloud Panel -> API Credentials
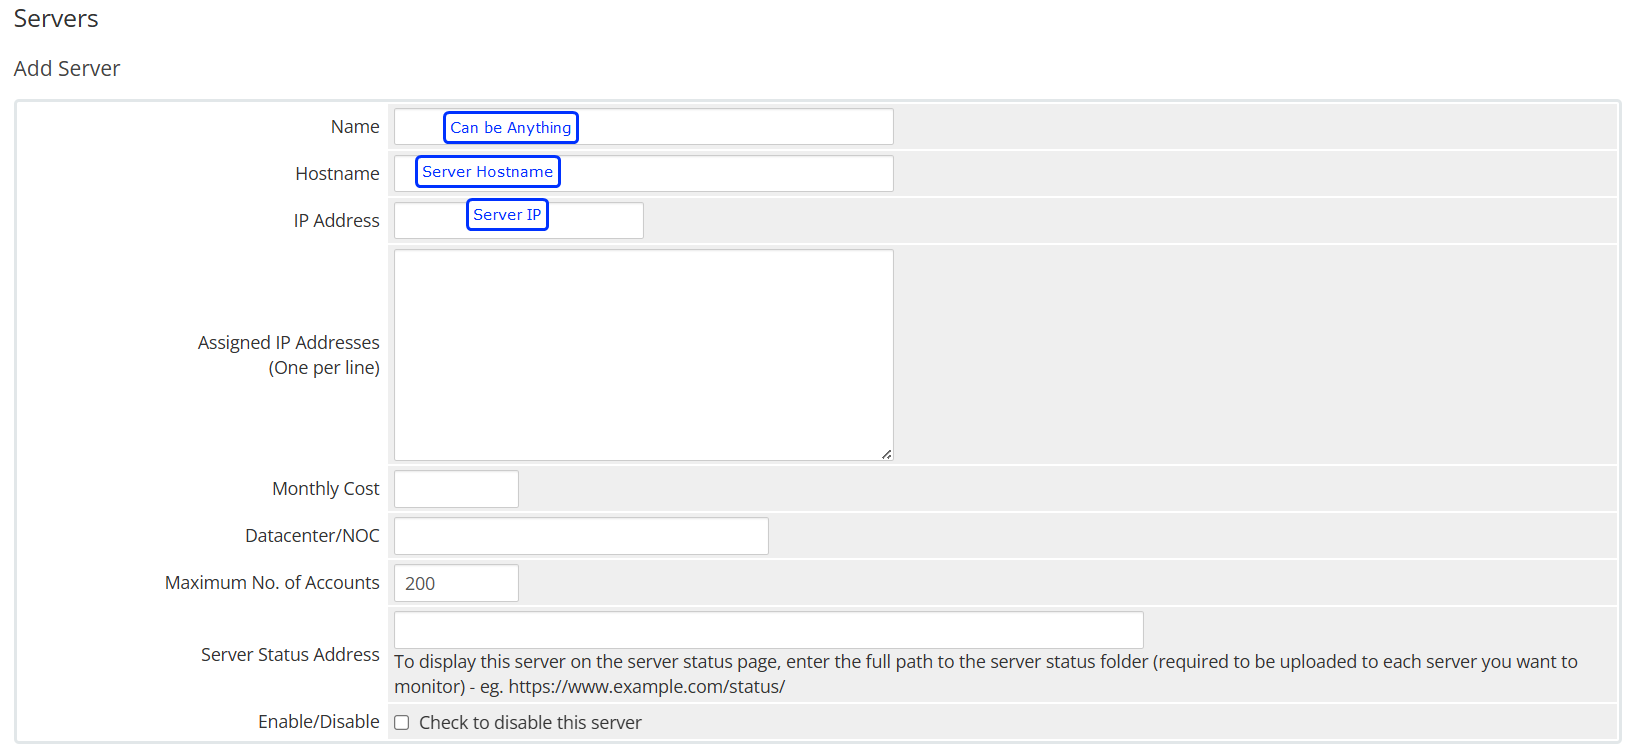
Adding Server to WHMCS
To add the Virtualizor Server to WHMCS login to WHMCS Admin Panel
then go to WHMCS Admin Panel -> Setup -> Servers -> Add New Server
Fill the form as shown in the below images :
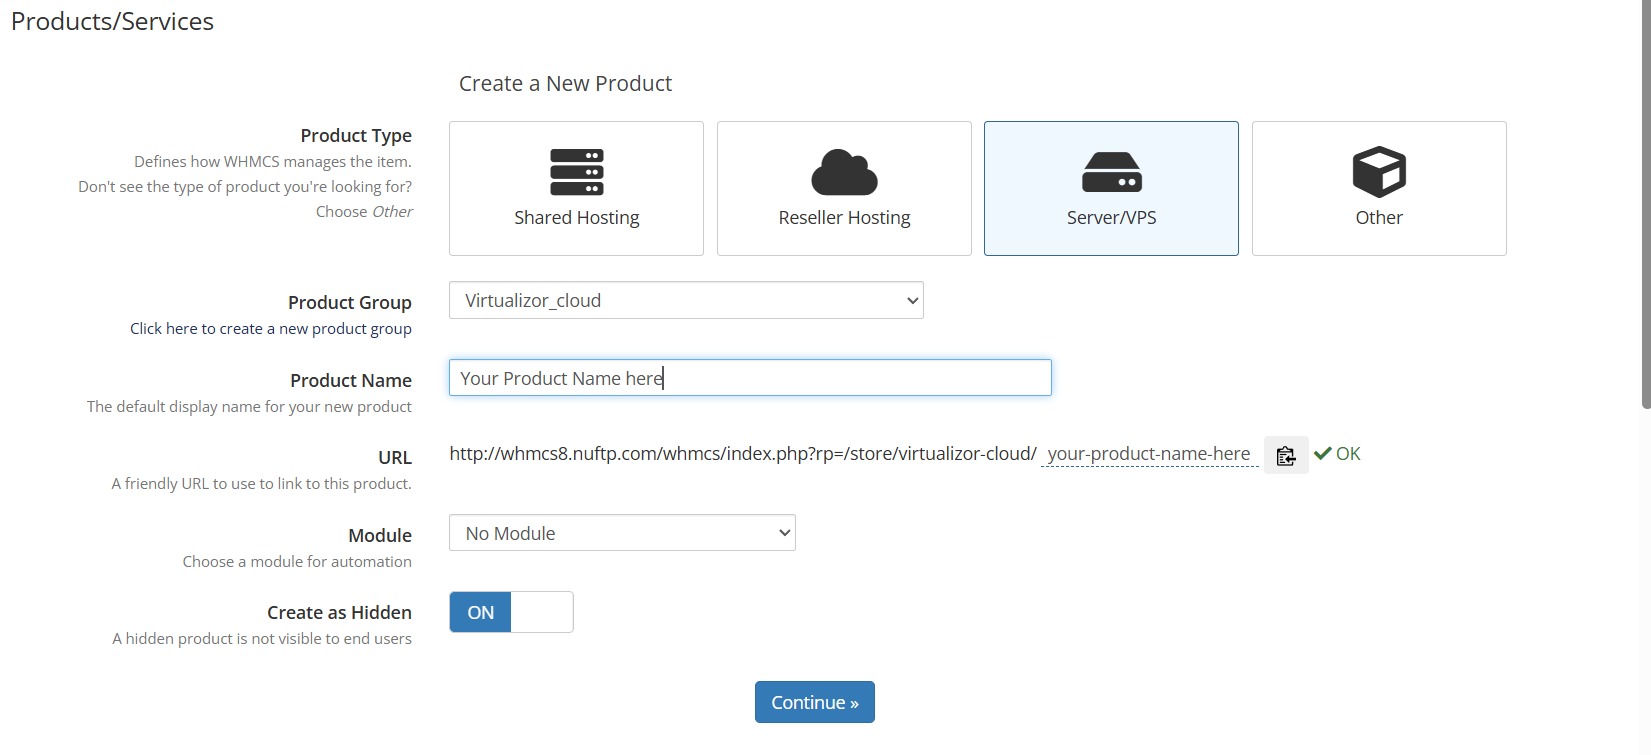
Creating a Product
Now, you will need to create a product.
Product
To do so go to WHMCS Admin Panel -> Setup -> Products/Services -> Create a New Product
Fill in the details as per the following image and specify the Product's Name of your choice
Module Settings
Now proceed to the Module Settings.
Click on the Module Settings Tab and choose the Module Name Virtualizor_cloud. A list of fields will load which will be the settings for the new product.
A sample configuration is shown in the below image.

The fields are self explanatory, but the following is a detailed explanation :
- Type : The Virtualization type of the server you added.
- Disk Space : The amount of disk space that the VPS will be allowed to use.
- Guaranteed RAM : The amount of RAM to be allocated to the VPS
- Burstable RAM : The amount of Burstable RAM allowed to the VPS in MBs. This is only for OpenVZ
- SWAP RAM : Swap Ram for the VPS. This is for Xen and KVM VPSs
- Bandwidth : The allowed bandwidth to the VPS in GBs
- CPU Cores : Number of CPU Cores
- VNC : Whether to enable VNC or not for the VPS. Applies to Xen and KVM
- IPs : The number of IPs to be allocated to this VPS.
- IPv6 Subnets : The number of IPv6 Subnets to be allocated to this VPS.
- IPv6 : The number of IPv6 Addresses to be allocated to this VPS.
- Region : Name of the Region that the VPS must be created on. You can also specify auto as the name of the Region. If you specify auto then the WHMCS module will AUTO select the server based on the Virtualization tecnology.
Custom Fields
Now Click on the Custom Fields Tab and fill in the form as per the following image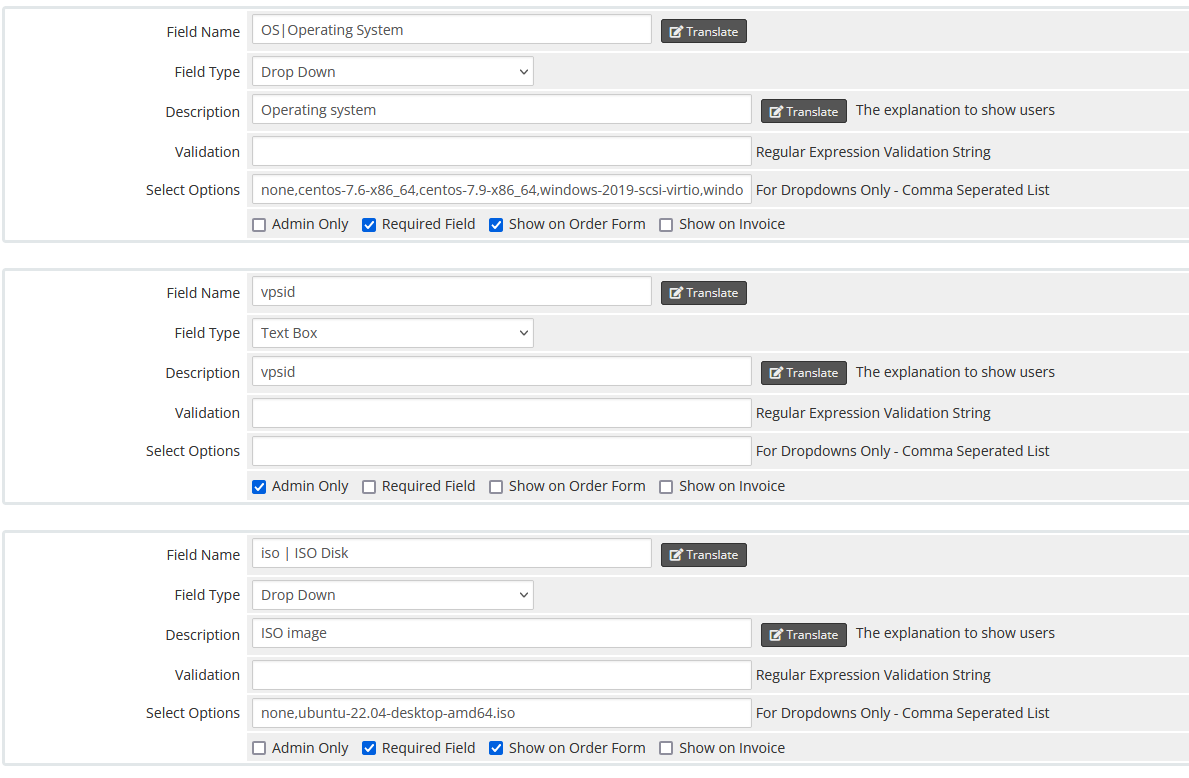
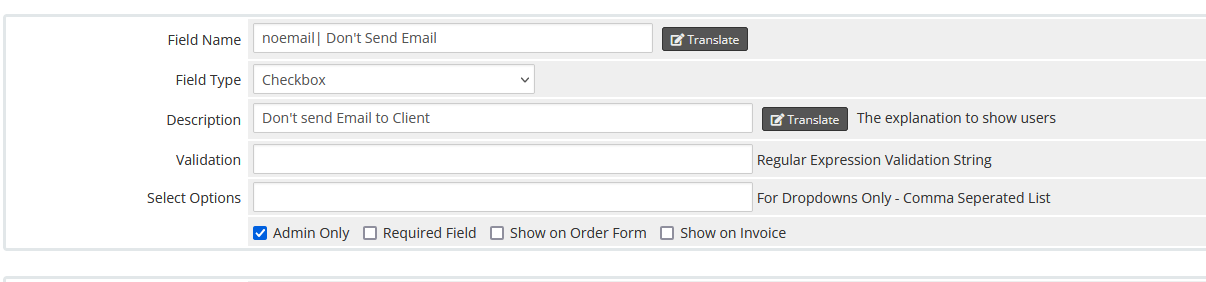
Just for your information the vpsid is the VPS ID as per the Virtualizor Database and needs to be stored for any future action like Terminate, Suspend, etc. Please fill it as per the above Image.
The OS field is the List of Operating System Templates on your server. Virtualizor provides templates to its users. Its a COMMA seperated value. This will allow the USER to choose the OS when he is signing up for the VPS. Also the list should not have the template suffix of tar.gz, img, etc. e.g. centos-7-x86_64.tar.gz should be centos-7-x86_64 in the OS List. Basically the module does a name match of the OS Template.
The ISO field is to display list of ISO images to your clients. This field will allow users to choose the ISO image while signing up for any plan.
NOTE : Please add 'none' value when you add ISO and OS field. (Please refer the screenshot above)
NOTE : ISO option is not supported for OpenVZ and XEN-PV VPS.
Configurable Options [OPTIONAL]
You can add the Configurable Options as per your requirements or
exclude one or more of the options below if you do not need it.
Note: The order of preference for selection of Configurable Options is first i.e. If a Product/Service has (lets say) Ram defined as 512 MB and you have also created a Configurable Option with variable Ram options, then the users chosen Ram value from configurable options will be used and not the ram value in Product/Service.
Following are the Configurable Options available in Virtualizor WHMCS module.
- Number of IPs
- Number of IPv6 Address
- Space
- RAM
- CPU Cores
- Operating System
- Control Panel
- rdp
- bpid
- nic
To add, go to WHMCS Admin Panel -> Setup -> Products/Services -> Configurable Options. Then click on Create a new Group

Now, click on the Add New Configurable Option button. A new window will open.
Number of IPs : Add a configurable option for Number of IPs as below: 
 Space : Add a configurable option for Space as below:
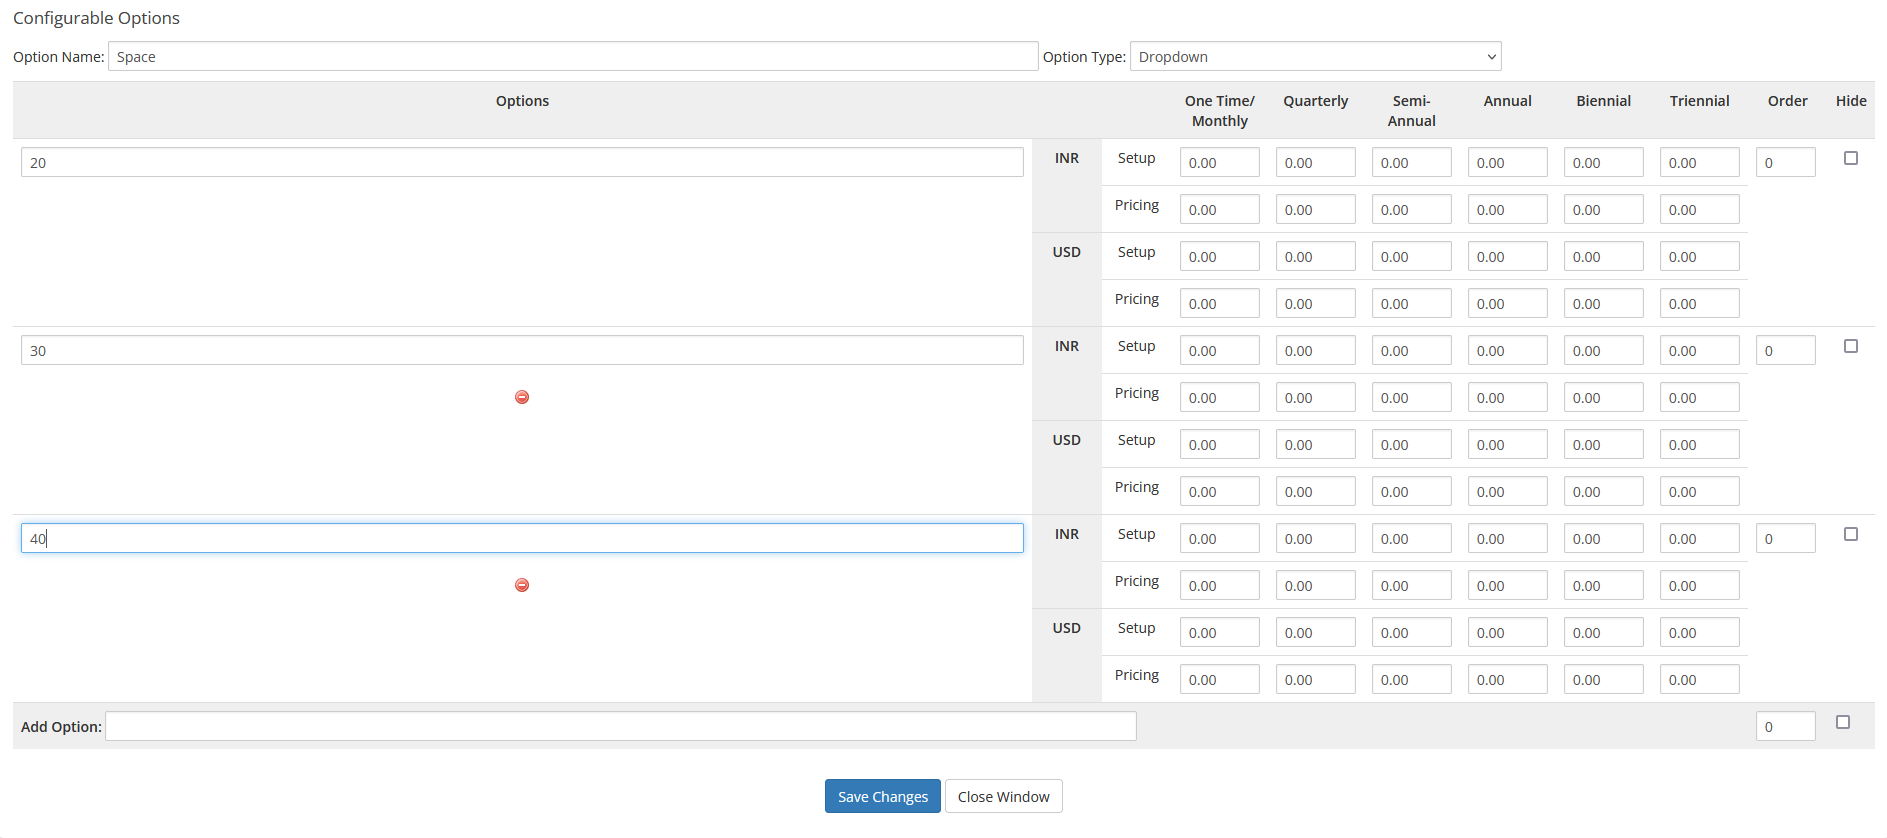
RAM : Add a configurable option for RAM as below:
Bandwidth : Add a configurable option for Bandwidth as below: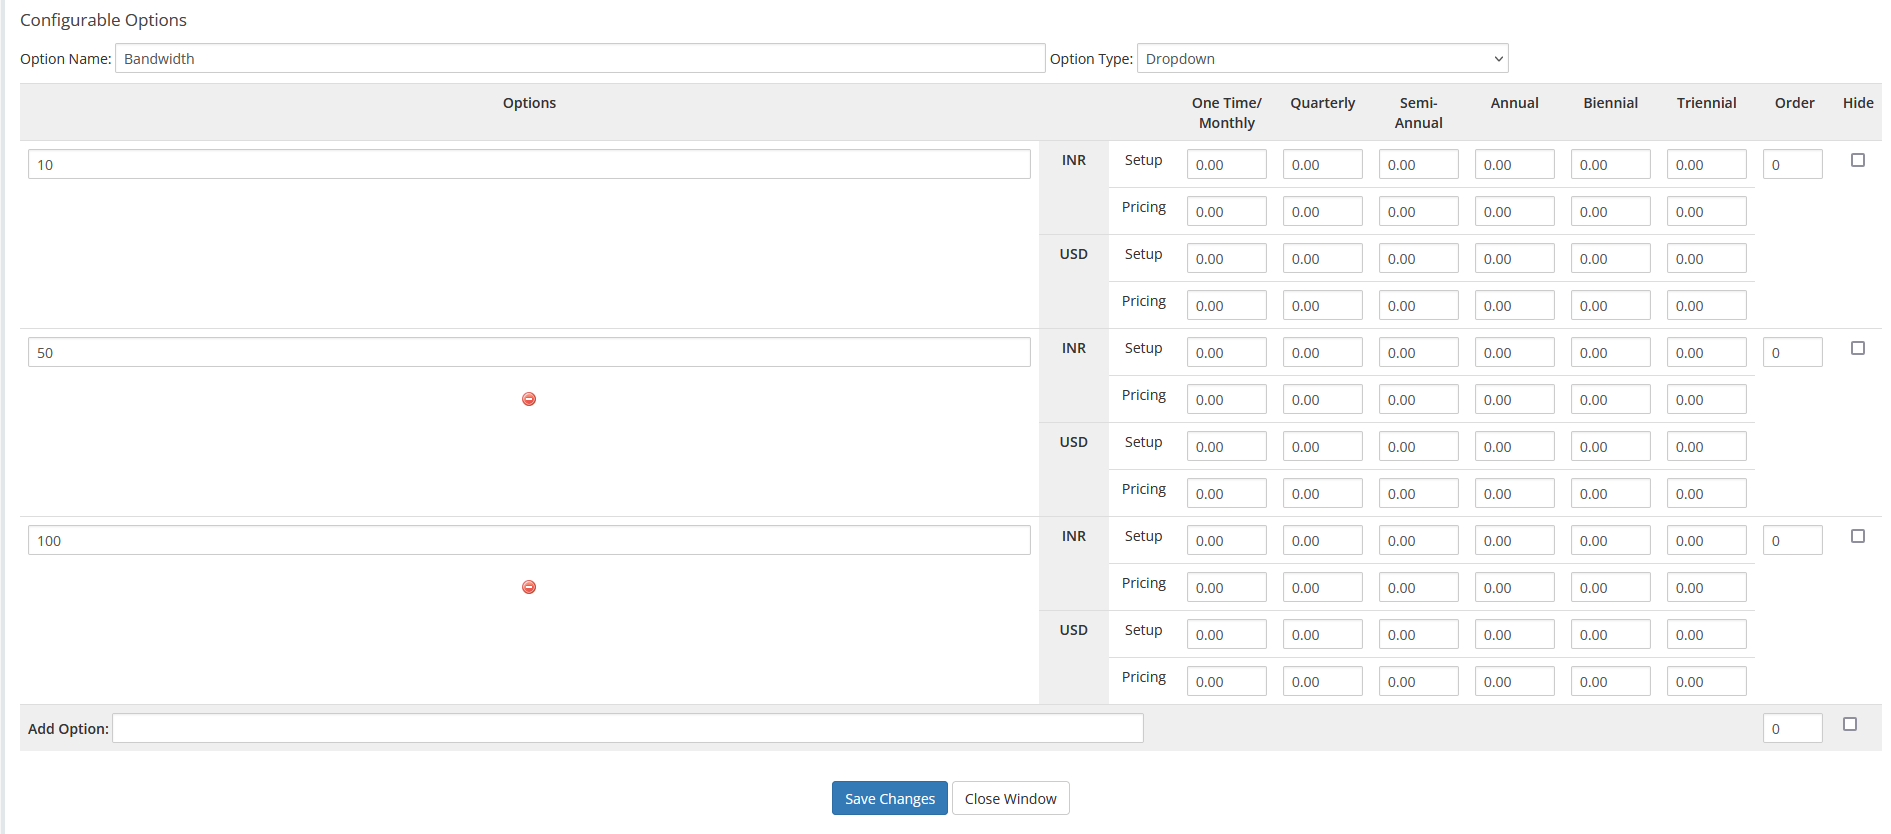
CPU Cores : Add a configurable option for CPU Cores as below:
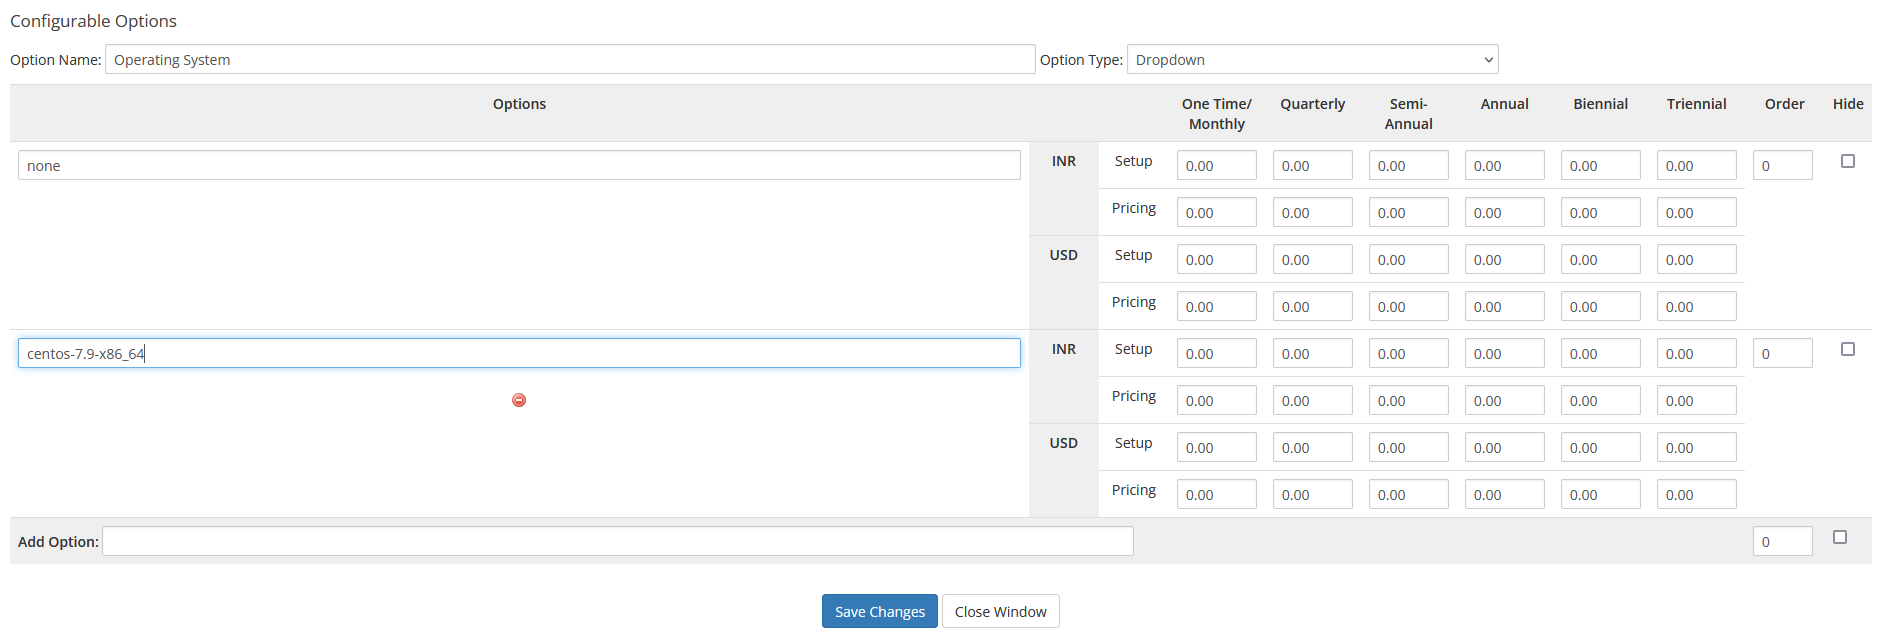
Operating System : Add a configurable option for Operating System as below:
Control Panel
BuycPanel Licensing : Control Panel Configurable option for BuycPanel licensing :
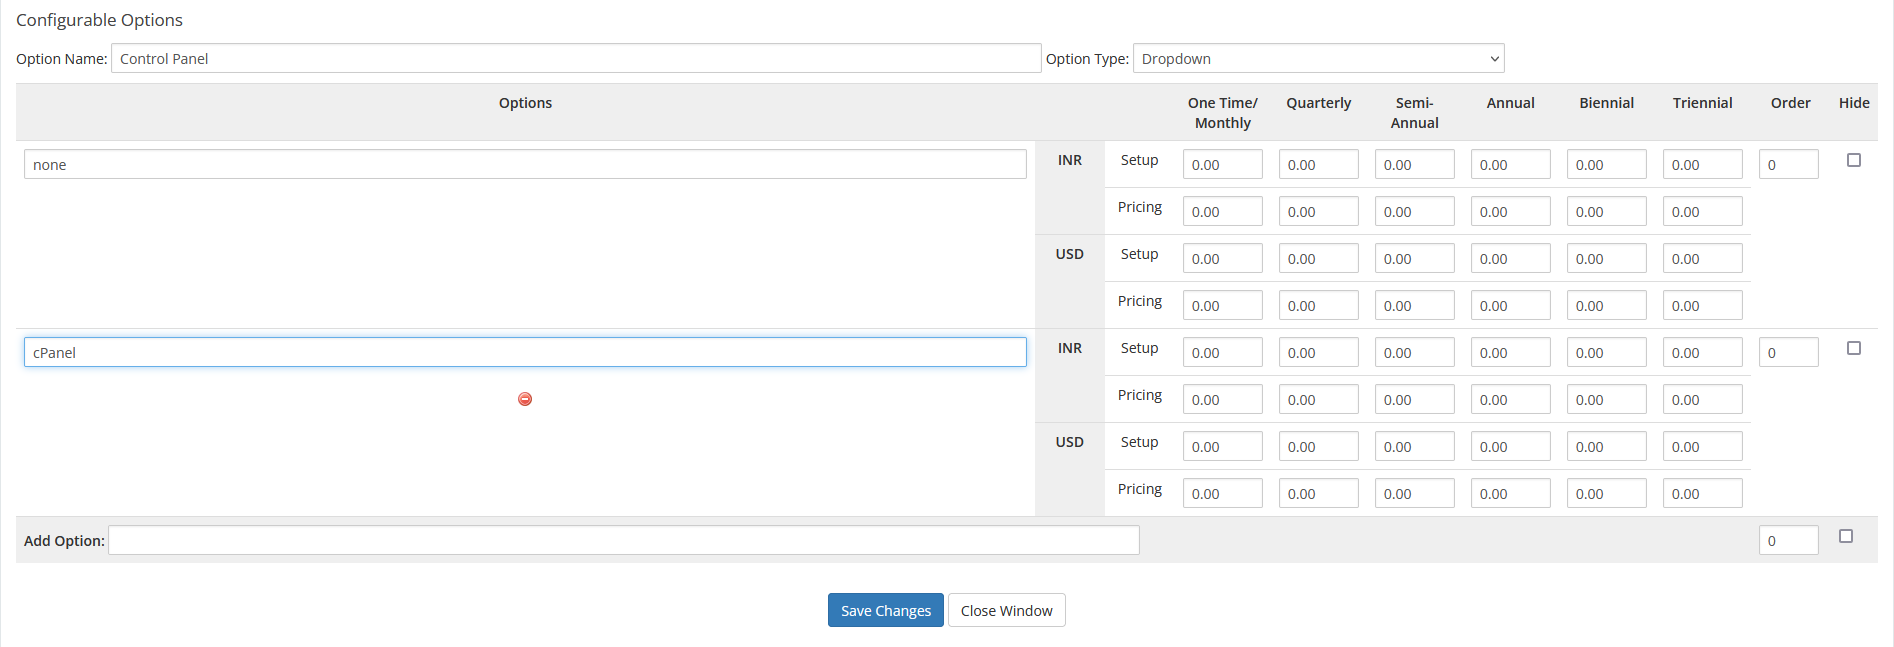
You can assign cPanel installation for your Virtualizor VPS. Control Panel option allows you to display a dropdown of control panel list which can be selected by the user and the license will be automatically activated by BuycPanel.
NOTE : You must enter the BuycPanel Login and API Key in virtualizor_conf.php file.
rdp : Add a configurable option for rdp as below

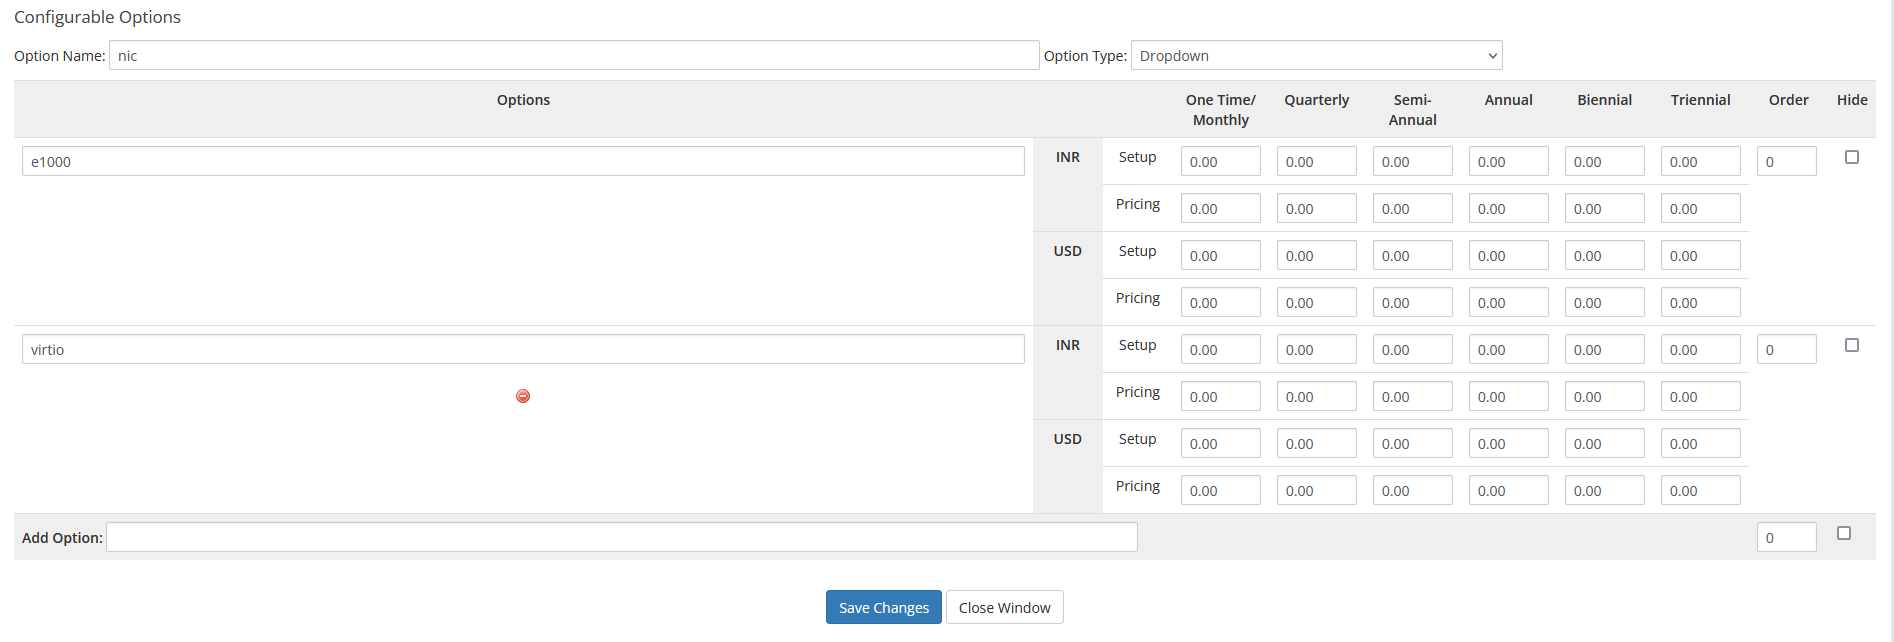
nic : To choose a Network interface type for a vps.
Firewall Port
Please make sure that the whmcs server has ports 4081,4082,4083,4084 and 4085 opened.
Support
If you need any assistance then please contact Softaculous Virtualizor Support. Please send us a screenshot of the Module Settings and the Custom Fields you added to the Product.