Floor Management
Bare Metal › Floors - define the physical levels inside a datacenter
What is a Floor & why add one
A Floor represents one physical level inside a datacenter — ground floor, second floor, basement, mezzanine, etc. Each floor is described by a row × column grid that maps to where racks will sit on the physical floor plan. You must add at least one floor before you can place any rack.
Adding a floor gives you:
- A coordinate system for placing racks. Every rack you create later picks a
(row, column)on a specific floor. - An occupancy heatmap — the floor visualiser (5) shows you which grid cells have racks and how full those racks are.
- A semantic separator — sort racks by physical level, plan cabling per floor, track migrations between floors during datacenter consolidation.
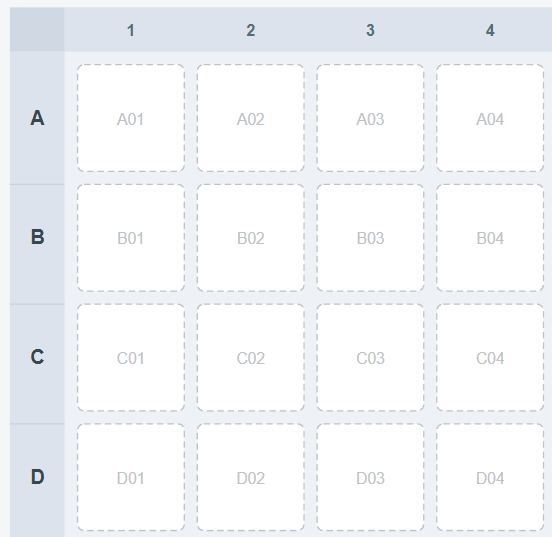
Rows are lettered (A, B, C…) and columns are numbered. Each cell is one potential rack slot. Pick rows/columns that map to your real physical floor plan - you can change these later, but resizing after racks are placed will require you to re-verify positions.
Where to find it
To create one: or the Add Floors button on the list page.
The List Floors page
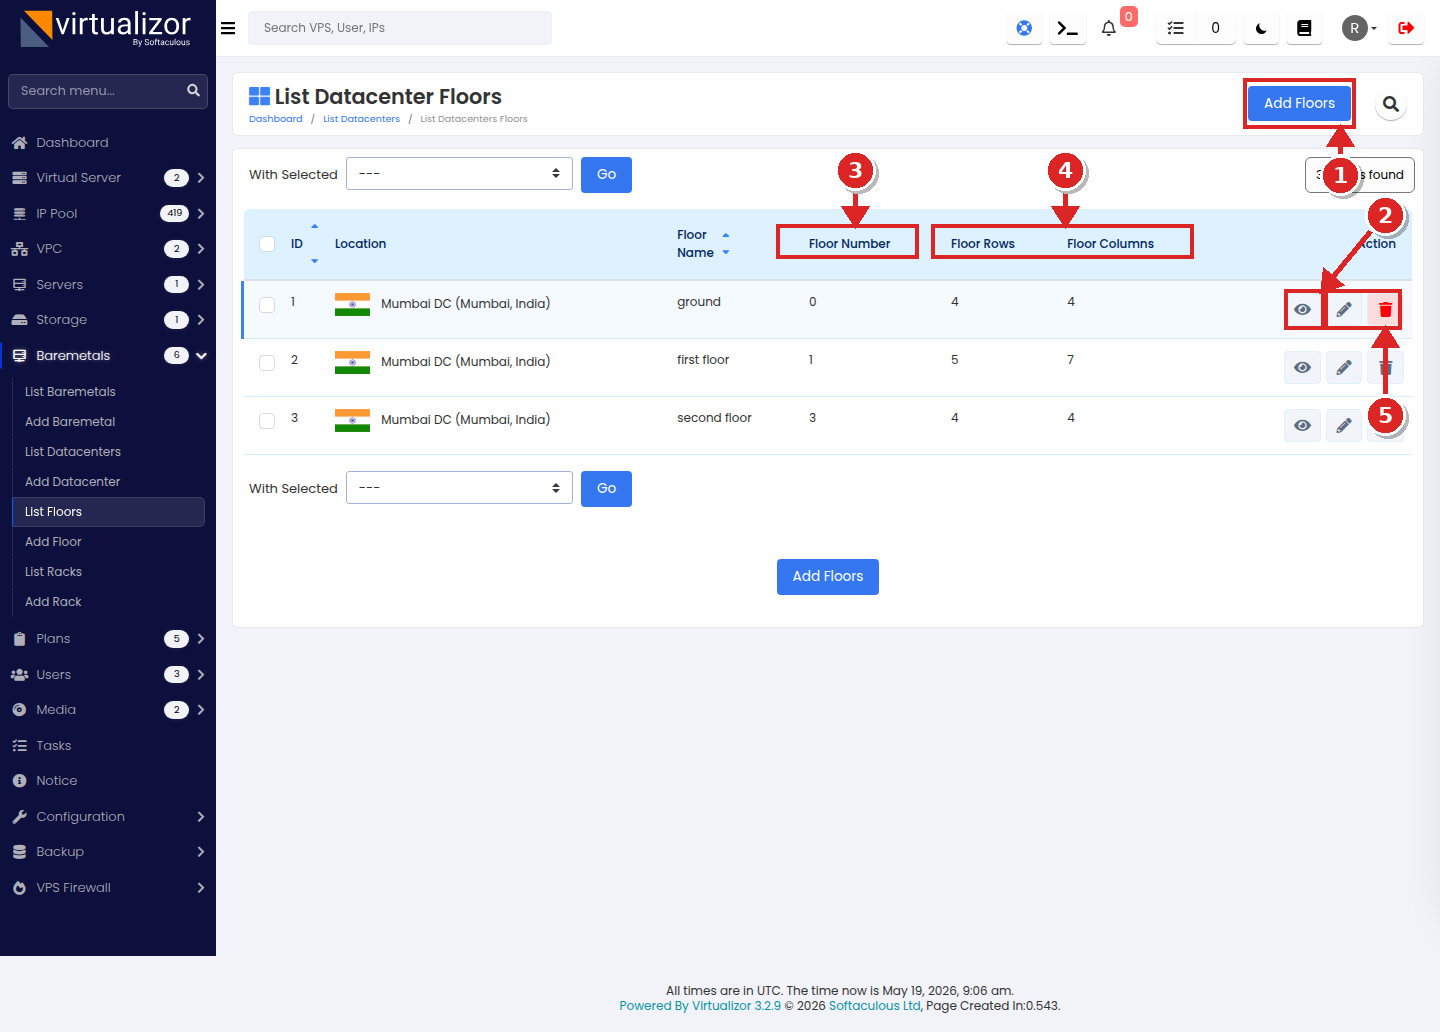
- Add Floors button — opens the batch add form
- Eye icon (View Floor) — opens the floor heatmap visualizer (5) fr that floor.
- Floor Number column — numeric sort key (e.g. 0 = Ground, 1 = First, etc.). Two floors in the same DC may not share a number.
- Floor Rows / Floor Columns columns — the grid dimensions you configured at Add time.
- Edit / Delete icons — per-row pencil and trash. Delete is blocked (with a warning) if the floor still contains racks.
Column reference
| Column | Description |
|---|---|
| ID | Internal primary key. |
| Location | Quick way to see which datacenter this floor belongs to. |
| Floor Name | Display label (e.g. ground, first floor). |
| Floor Number | Numeric sort key. Unique per DC. |
| Floor Rows | Number of grid rows (A, B, C…). |
| Floor Columns | Number of grid columns (1, 2, 3…). |
| Action | View heatmap / Edit / Delete. |
Add Floor - the batch form
Where: or the Add Floors button on the list.
Why: the Add Floor screen lets you queue multiple floors for the same datacenter and save them together. This is faster than re-submitting the form for every level.

- Select Datacenter — pick the parent DC. Existing floors for that DC are auto-loaded into the table below so you don't accidentally duplicate.
- Floor Name + Floor Number — the label and unique numeric key for this floor.
- Floor Rows × Floor Columns — the grid size. Plan this against your real floor plan; resizing later affects existing rack placements.
- Add Floor — queues the current row into the table below (it does not save yet). Use this repeatedly to add multiple floors at once.
- Building preview — shows the queued floors stacked. Reassures you the batch looks right.
- Save Floor Plan — commits the entire batch. Until you click this, nothing is persisted.
Field inventory
| UI Label | Required | Type | Purpose & tips |
|---|---|---|---|
| Select Datacenter | REQUIRED | Select (with flag) | Parent DC for every floor in this batch. |
| Floor Name | REQUIRED | Text | Free-form label, e.g. Ground, Floor 1, Mezzanine. |
| Floor Number | REQUIRED | Number | Numeric sort key. Must be unique within the DC. |
| Floor Rows | REQUIRED | Number | Grid rows. Letters A, B, C… are assigned in order. |
| Floor Columns | REQUIRED | Number | Grid columns (1, 2, 3…). |
Floor Visualizer (heatmap)
Click the eye icon on any row in the list to open the visualizer. This is your at-a-glance view of how full a floor is and which cells host which rack.
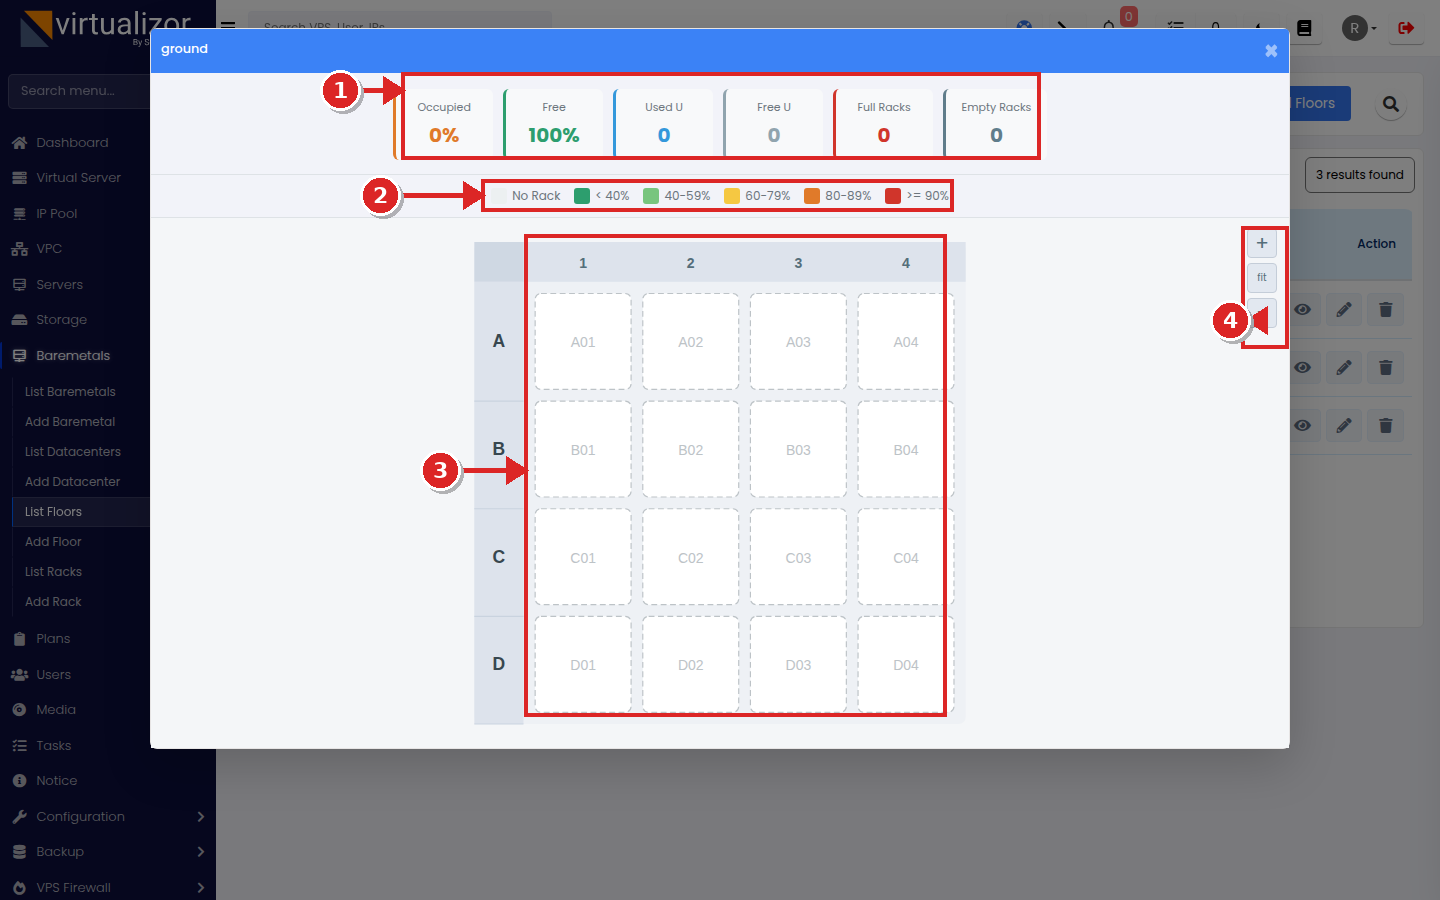
- Occupancy KPI strip — live percentages and counts: Occupied%, Free%, Used U, Free U, Full Racks, Empty Racks.
- Colour legend — how the heat colours map to "% U occupied per rack". No Rack means no rack has been placed in that cell yet.
- Grid cells — one cell per (row, column). Click any cell that has a rack to drill into the rack U visualizer.
- Zoom controls — "+" zoom in, "fit" reset to fit, "−" zoom out. Useful on dense floors.
Delete Floor
Trash icon on a row. Behaves like DC delete:
- If the floor has no racks — simple confirmation, then delete.
- If the floor has racks — a cascade warning lists the racks that will be affected.
Best practice: empty the floor (move or delete racks) before deleting it.