Overview
You can use Virtualizor to create / clone an existing VPS. Its very simple to do so.
Some Notes
- Create VPS of Minimum size for Linux OS templates because OS template size is equal to VPS disk space.
- Create only one standard ext 3/4 FS or xfs partition in vps mounted for ' / ' while installing OS from an ISO so that Virtualizor can perform operations.
- Set the Network interface name to eth0
- Install all necessary software on the VPS
- Stop vps gracefully from panel.
How to do it ?
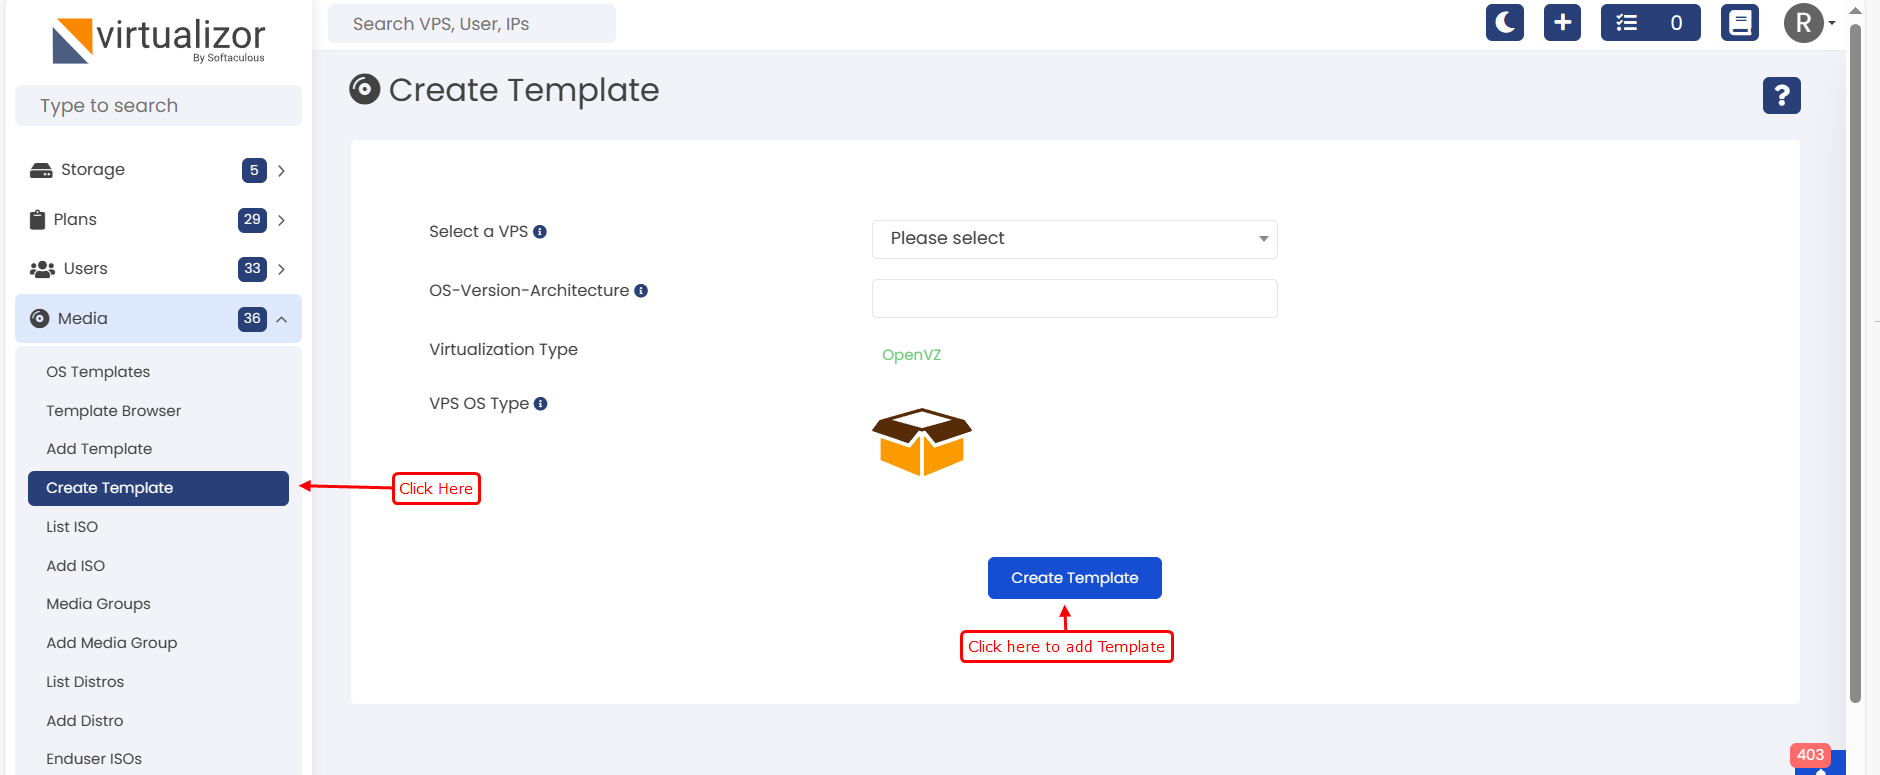
- Just go to the Virtualizor Admin Panel -> Media -> Create Template
- Select the vps id which of which you want to create template
- Once the template is created it will be automatically added to virtualizor -> Media -> OS templates, so you can use this template to create VPSs on your server.
- You can check the template creation logs in /var/virtualizor/log/createtemplate.log file on the server where the VPS is hosted.
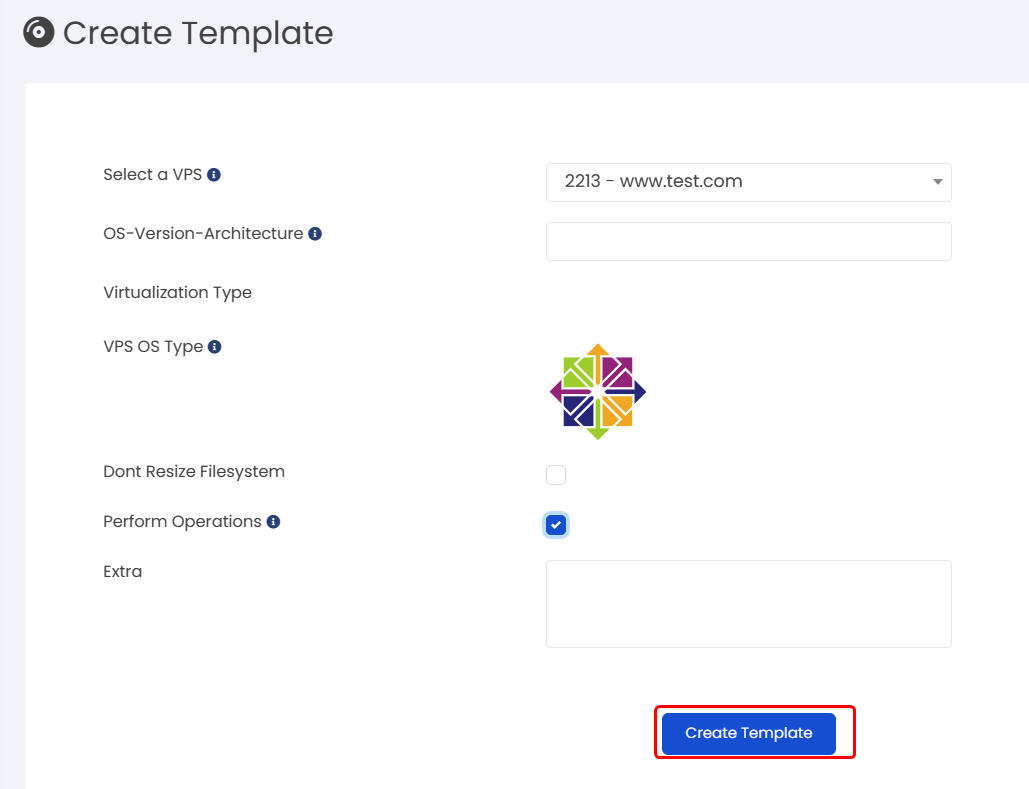
OS-Version-Architecture : OS template name. (For OpenVZ 7 CT, template name must be in format: OS-Version-Arch, eg CentOS_Webserver-6.5-x86_64)
pygrub : PyGrub enables you to start Linux domUs with a kernel
inside the DomU instead of a kernel that lies in the filesystem of the
dom0. If you want to enable pygrub for the template then tick the
checkbox (Only for Xen VPSs only).
Check to create Ext4 file system. : As the name suggest, if you
want to create a Ext4 file system for the template then tick the
checkbox. By default ext3 filesystem is created.
Disk Name : By default the Drive is sda. Xen templates specifically require xvda to be specified as the Disk name.
Dont Resize Filesystem : If checked virtualizor will not resize the File system of the VPS which is created from this template.
Perform Operations : Operations like changing network settings,
root password will be performed for the VPS created from this template
only if this checkbox is checked while creating the template. You can
however change it anytime after the template is created by editing the
template.
Windows Templates
Notes :
- Create VPS of Minimum size because OS template size is equal to VPS disk space (15Gb) .
- Install all necessary software in the VPS. (Optional)
- Set the network to DHCP.
- Shutdown Windows from RDP/VNC.
1. Create vps using ISO
You will need to create vps using your Windows ISO and attach virtio drivers as secondary ISO for vps :
https://github.com/virtio-win/virtio-win-pkg-scripts/blob/master/README.md
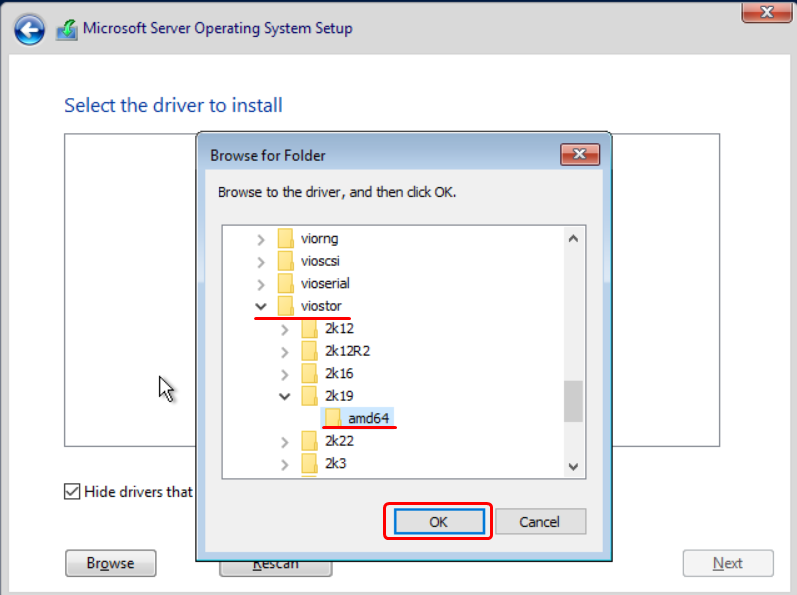
If the drivers fail to load disk in vnc while booting the vps, then you can use following steps to detect the vps disk :
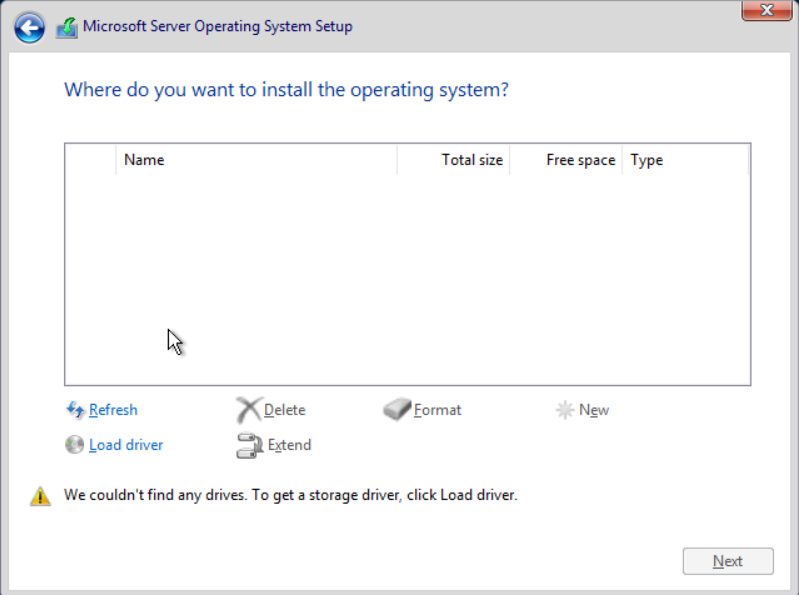
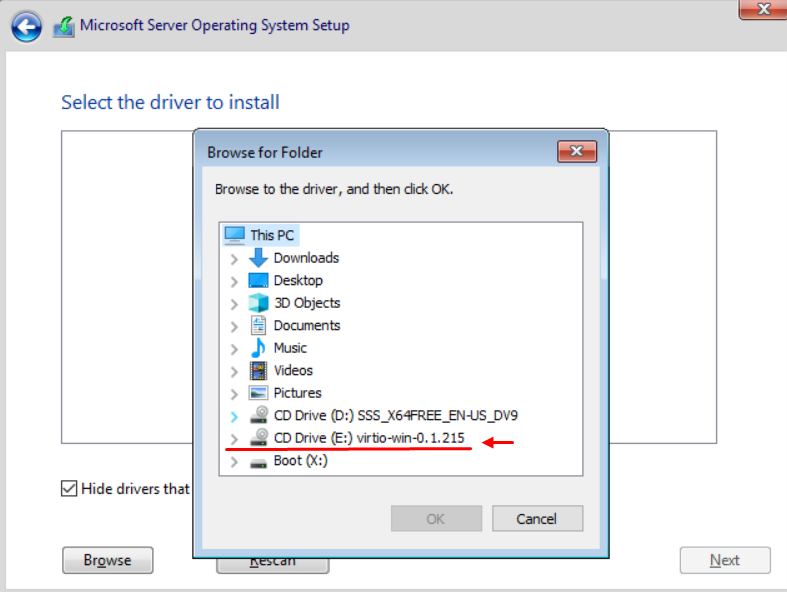
You can go with either viostor or vioscsi directory :
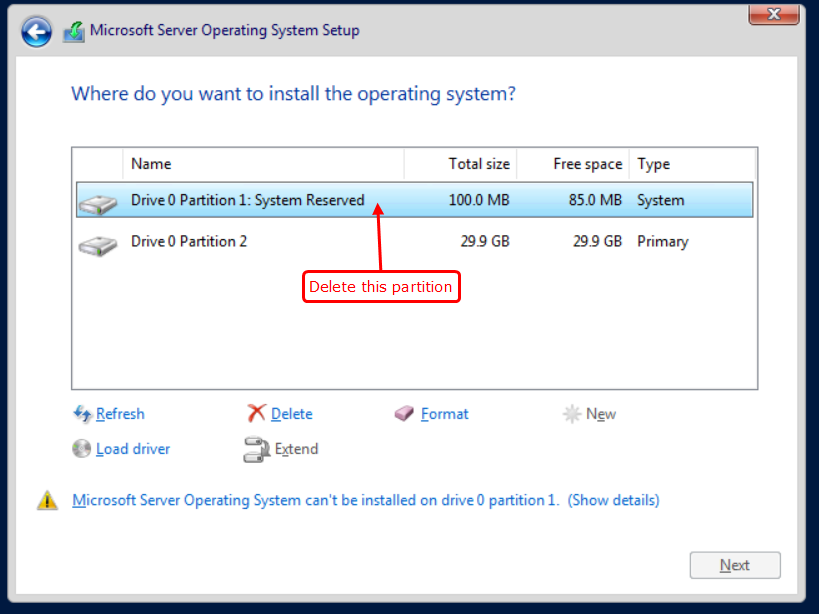
2. Removing System reserved Partition
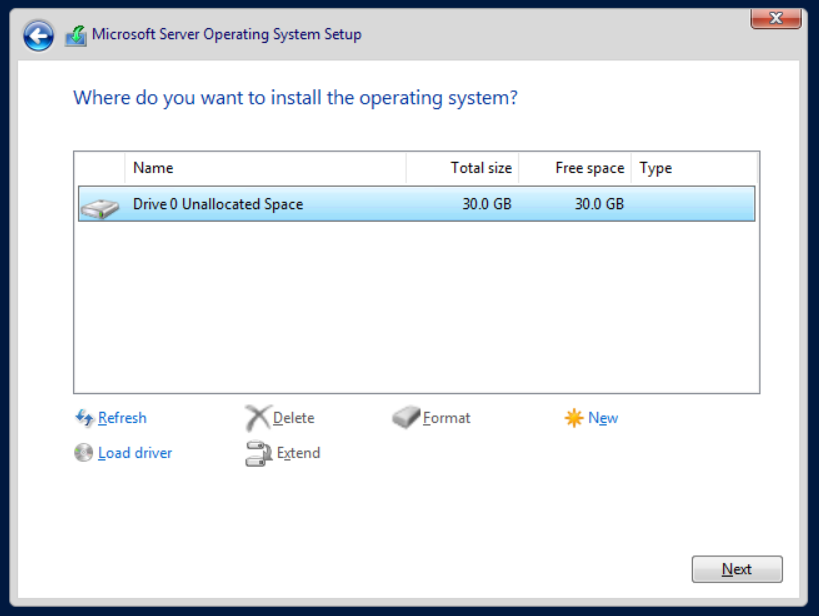
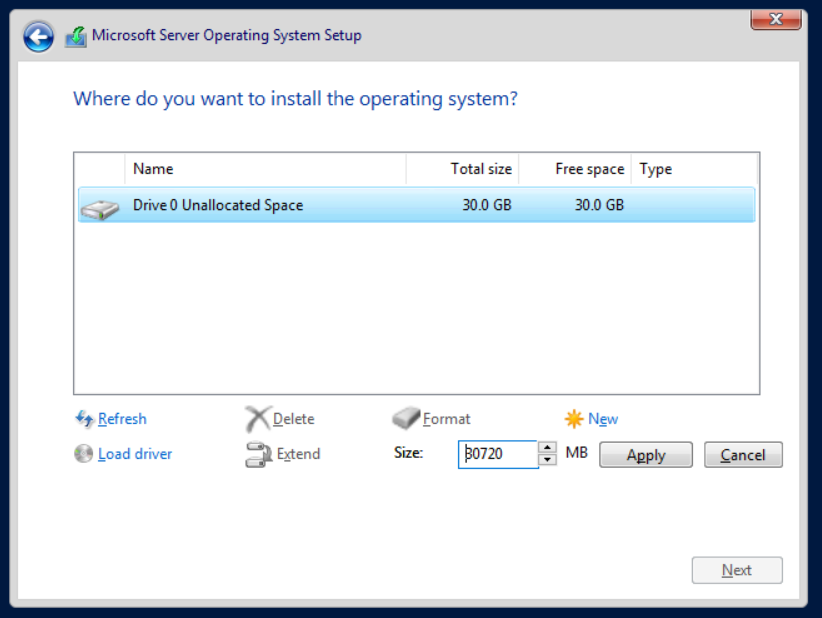
2a. While installing OS from your ISO
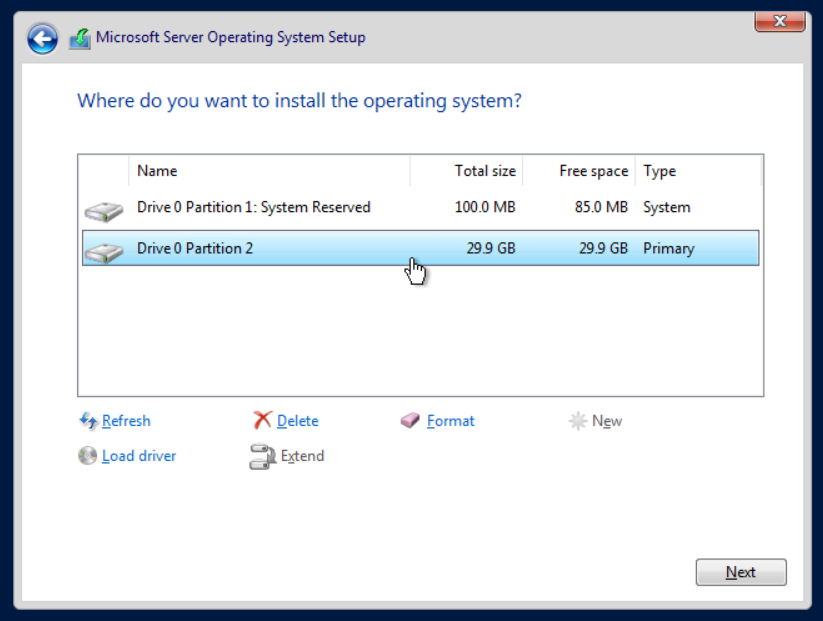
Click on new partition and simply choose apply without changing any value
Delete the newly created partition 1 and proceed with installation on 2nd listed partition which is now the partition 1 in last image
2b. In case you have missed the 1st method you can use this method For removing the System reserved partition after installing OS, please follow the steps given below :
Type:
bcdboot c:\windows /s c:
You should get a message similar to:
c: Boot files successfully created.
2) Open the Disk Management GUI (you could use diskpart for scripts),
locate the C: partition right-click and select “Mark Partition as Active”,
select yes to the “do you want to continue message”
3) Reboot to confirm that everything is ok.
4) In Disk Management you can now delete the 100Mb System Reserved partition by right clicking on it and selecting “Delete volume”
Else you will need to create template from panel.
You can open ticket for any issues :
https://softaculous.deskuss.com/open.php?topicId=2
3. Template creation
e.g. root> /usr/local/emps/bin/php /usr/local/virtualizor/tools/windows.php /dev/vg/vsv1001-id-uuid windows-2008r2.img
Eg: If vps id is v1001 then lvname will be vsv1001-id-uuid.
- Once template is created, it gets stored under template path /var/virtualizor/kvm (for kvm virtualization), if this template is created on slave, then it must be copied back to master under same path
- Then add this template to Virtualizor panel by following guide mentioned at Add_OS_Template by selecting correct Virtualization type and specifying the template file name without mentioning URL.
- Also note, new VPS created from this template must have disk space greater than size of the uncompressed (.img) template.
We also do provide pre-created Windows OS Templates. Just contact our support team and they will make it for you and give you the templates.
Virtualizor also has the capability of setting the Windows Password if the admin username is "Administrator"